Motion Graphics Template Workflow in After Effects and Premiere Pro CC 2017 (Spring)
In-Depth After Effects CC and Premiere Pro CC 2017 (Spring) Tutorial on Creating, Editing, and Sharing Motion Graphics Templates
Adobe has reinvented motion graphics workflows. Again. Introducing the all-new Motion Graphics Templates. This tutorial is a deep dive into the workflow of Motion Graphics Templates in the Spring (April) release of After Effects CC and Premiere Pro CC.
Motion Graphics Templates replace Live Text Templates, and they feel like the final culmination of Dynamic Link motion graphic workflows between After Effects CC and Premiere Pro CC. Motion Graphics Templates use a new standalone .mogrt file format, and they do NOT require an After Effects CC subscription to be used in Premiere Pro CC. Thanks to the new Essential Graphics panel, it's simple to create complex motion graphics in After Effects CC and send them to Premiere Pro CC with customizable, fully editable properties. This is a long post; hopefully it answers all your questions about Motion Graphics Templates.
Jump to:
- Create a Motion Graphics Template in After Effects CC
- Create a Motion Graphics Template in Premiere Pro CC
- Differences Between Motion Graphics Templates
- Opening Motion Graphics Templates in Premiere Pro CC
- Organizing Motion Graphics Templates in Premiere Pro CC
- Editing Motion Graphics Templates in Premiere Pro CC
- Sharing Motion Graphics Templates
Create a Motion Graphics Template in After Effects CC
Select Composition
After you've created a title or graphic animation in After Effects CC, open the new Essential Graphics panel and select your composition under the Master drop down.
NOTE: All the properties or edited ranges in a Motion Graphics Template stay with the Master comp it's associated with.
Set Poster Frame
If you're title begins on an empty frame (like many do) you can set a custom poster frame to visually identify your comp in the Essential Graphics panel. Click the Set Poster Frame to save the current frame as the new thumbnail.
Select Editable Properties
Now it's time to build your Motion Graphics Template by choosing which properties are going to be editable in Premiere Pro CC. Simplly drag and drop properties from the composition to the Essential Graphics panel. It's that easy!
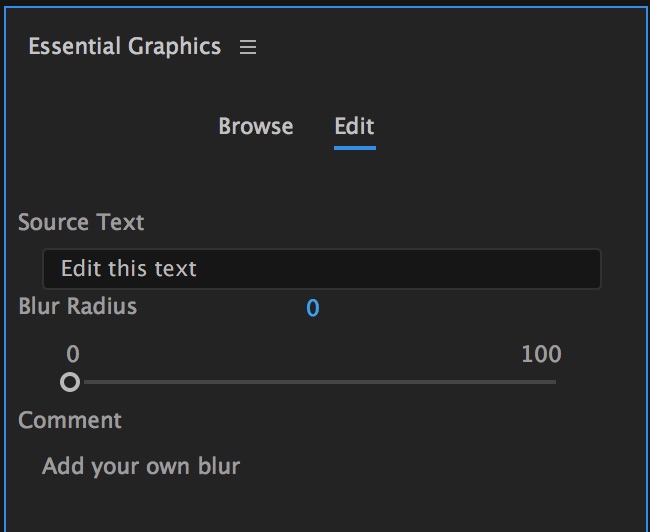
In the example above, you can see I have a very simple animated title with the new Fast Box Blur effect applied. I drag the Source Text and Blur Radius properties into the Essential Graphics panel to make both the text and the amount of blur editable in Premiere Pro CC.
Notice there is a Solo Supported Properties button indicating that not all properties are supported in Motion Graphics Templates. On top of that, if you have a complex animation, it might be difficult to find the properties you want to include in your Motion Graphics Template. The Solo Supported Properties button makes it easier to find properties by revealing only the ones that can be included in Motion Graphics Templates.
It's important to emphasize these are properties, not layers. Otherwise, you might be confused when After Effects CC won't let you drag a text layer into the Essential Graphics panel. It's because you need to drag the Source Text property into your Motion Graphics Template in order to make the text editable in Premiere Pro CC. Again, the Solo Supported Properties button will help you identify what properties can be included in your Motion Graphics Template.
Edit Range of Properties
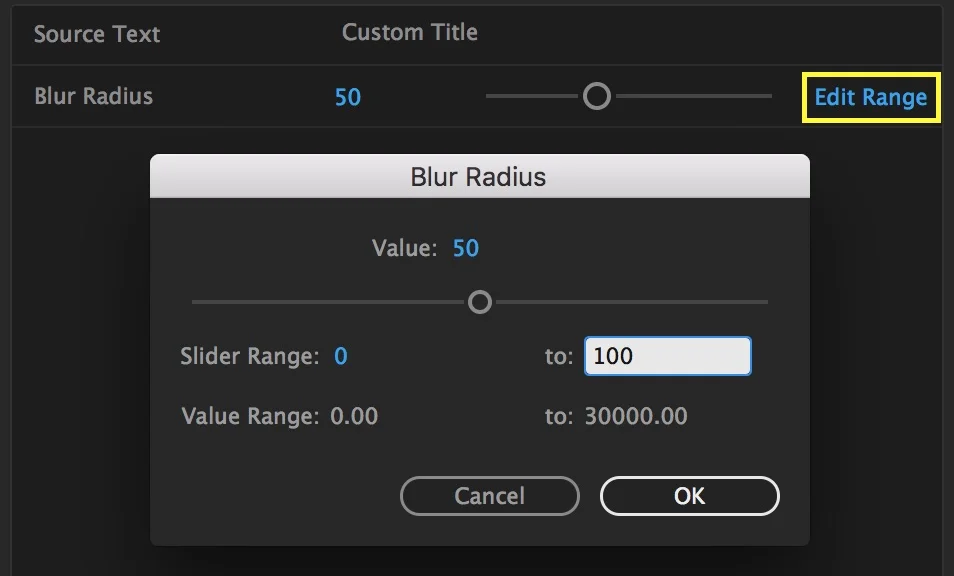
The Essential Graphics panel in After Effects CC allows you to modify the range of an effects property in a Motion Graphics Template. This means adjustments to the Motion Graphics Template in Premiere Pro CC will be limited to a specified range. You can see in the image below that I'm restricting the range of blur from 0 to 100. This is a very simple example, other properties will have more advanced range options.
Add a Comment
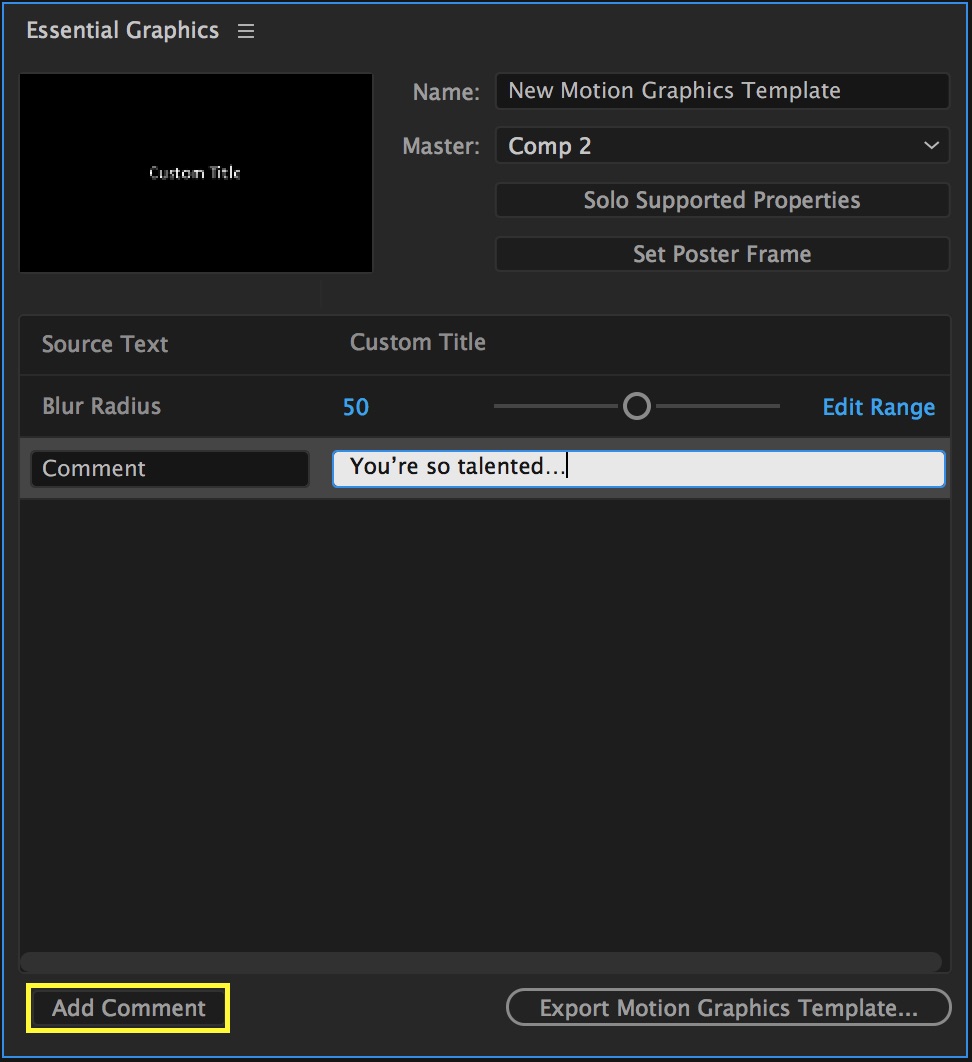
What better way to hand off a Motion Graphics Template to an editor than with a little note of appreciation. Or you could add a template description and instructions. The editor would appreciate that too.
Export Motion Graphics Templates
Once you're done adding properties, click the Export Motion Graphics Template button in the bottom right of the Essential Graphics panel. This will save your Motion Graphics Template to the new .mogrt file format, which can be edited in Premiere Pro CC.
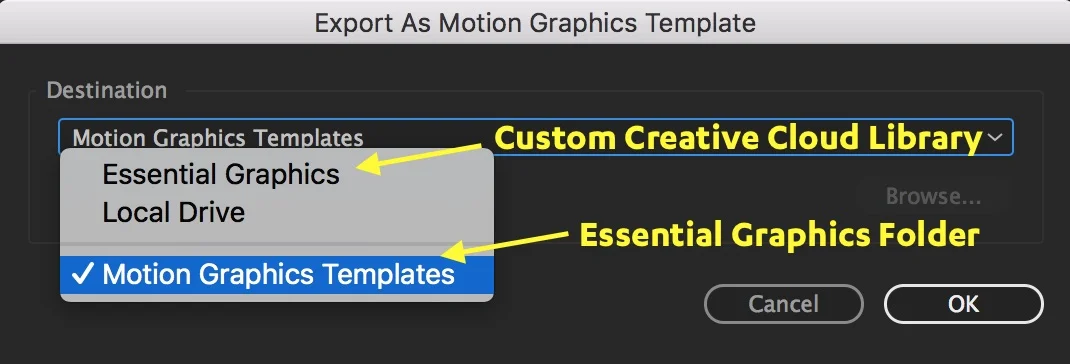
There are three destination options for exporting a Motion Graphics Template:
- You can save your template to your Local Drive, which will unlock the option to browse to a specific destination on your computer.
- You can save your template to Creative Cloud Libraries if you want to automatically sync your template to Premiere Pro CC or share it with other Creative Cloud users.
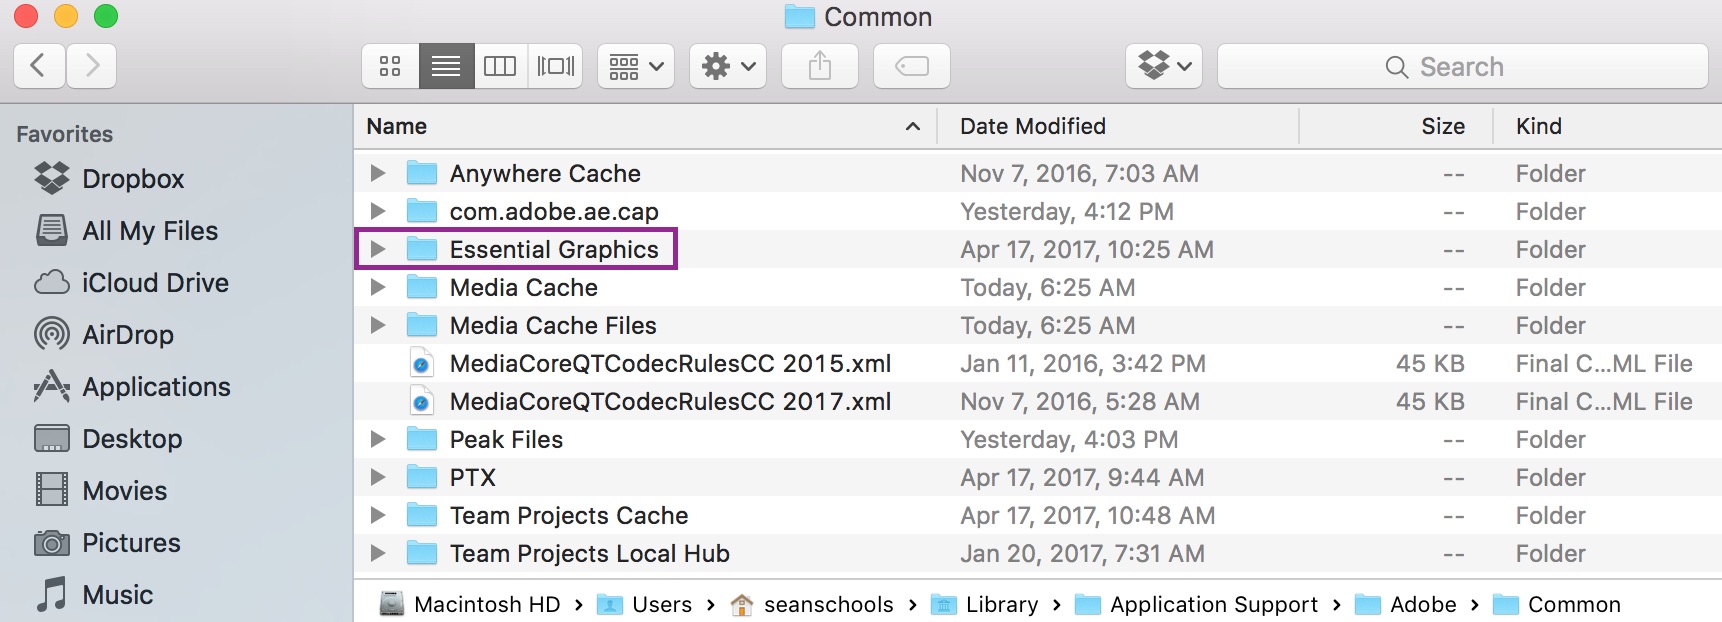
- The Motion Graphics Templates destination will save your template to the Essential Graphics user library folder. (Same location as the default Media Cache and Media Cache Files folders.) On a Mac you can access this folder under the Go menu. Hold the option key to reveal the hidden Library folder. Follow the path Library > Application Support > Adobe > Common > Essential Graphics. This is where all the preset Motion Graphics Templates that come with Premiere Pro and After Effects are installed.
Create a Motion Graphics Template in Premiere Pro CC
Create a Title in Premiere Pro CC
Motion Graphics Templates can also be created in Premiere Pro CC. First, check out this tutorial on how to Create Titles with the New Type Tool and Essential Graphics Panel in Premiere Pro CC 2017.1 (Spring).
Exporting a Motion Graphics Template from Premiere Pro CC
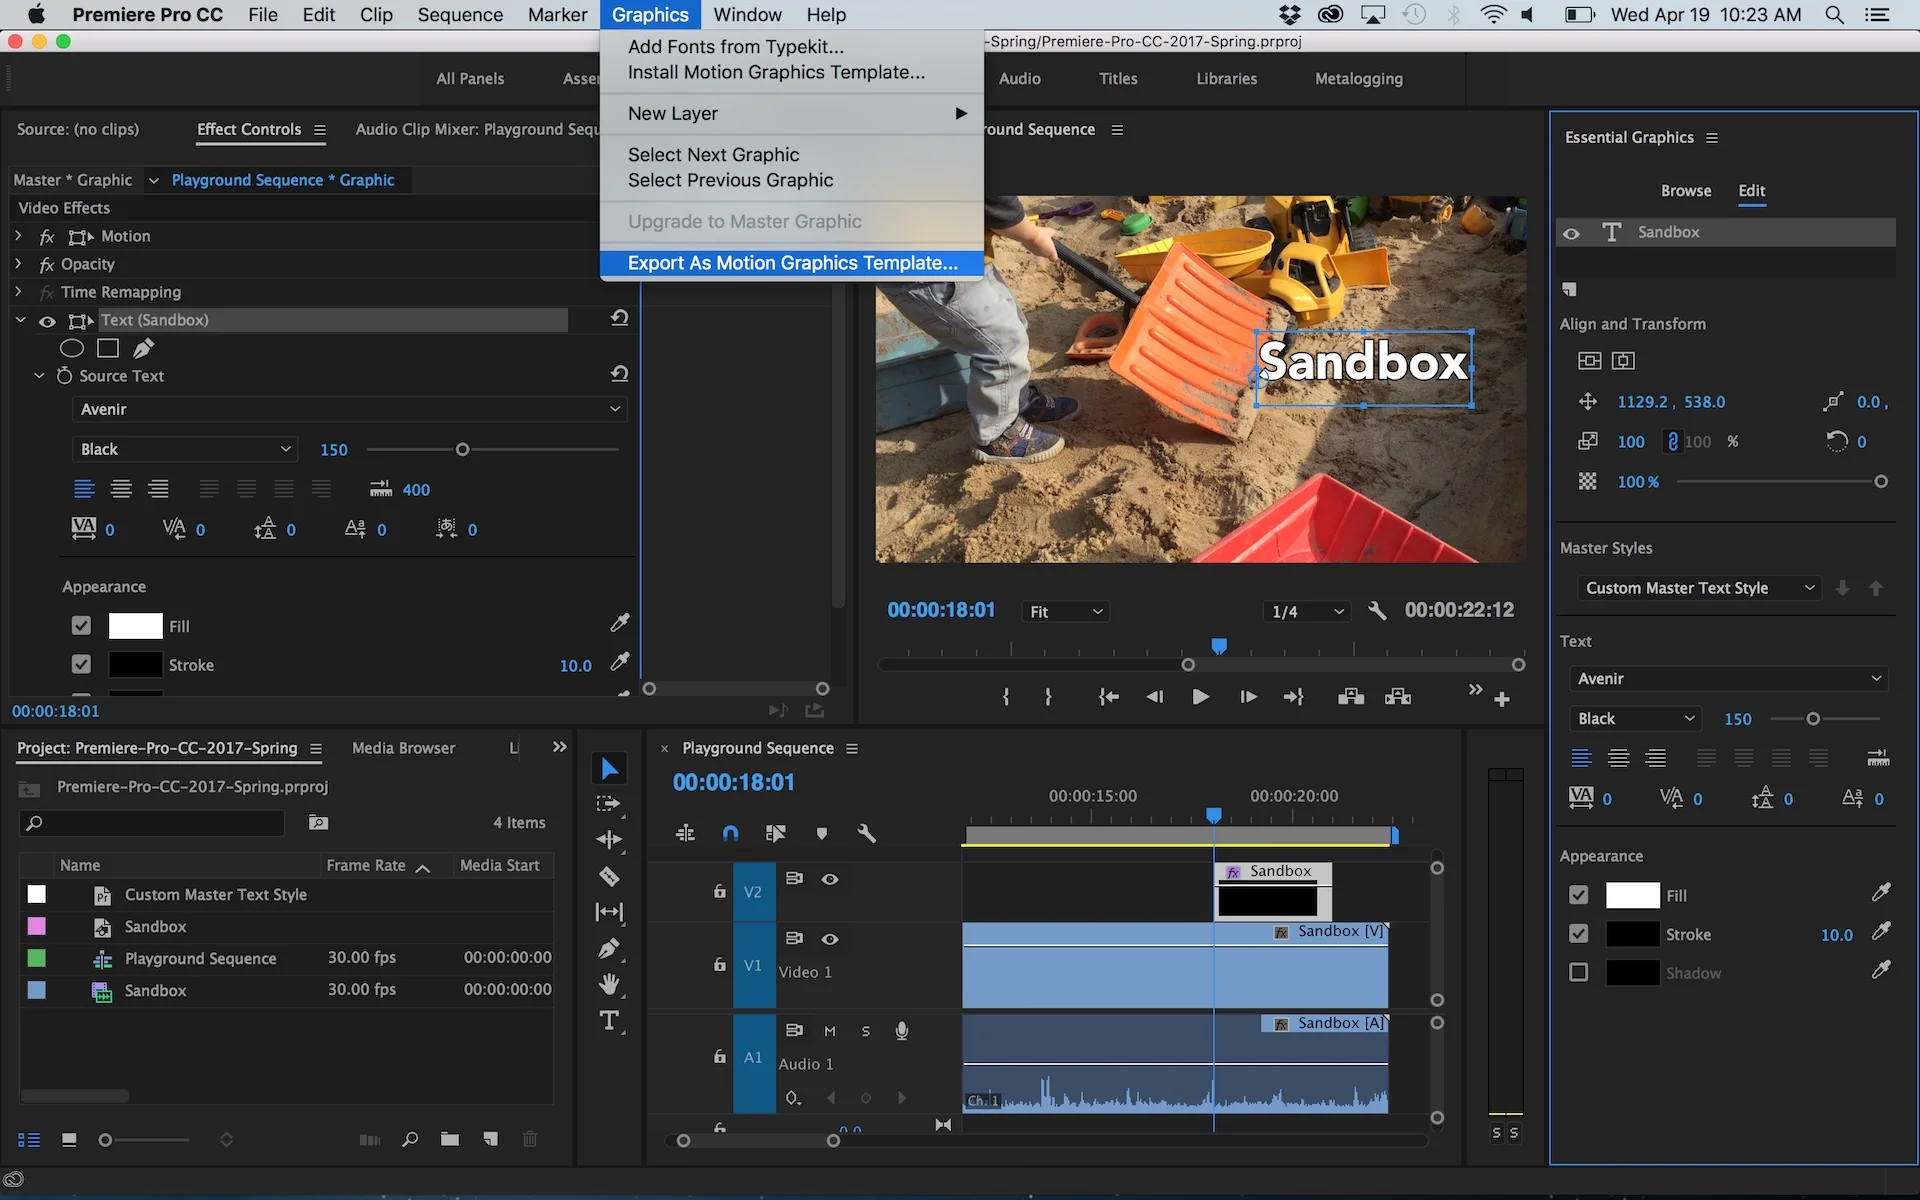
Once you've designed and animated your title, select the graphic clip, click the Graphics menu, and choose Export As Motion Graphics Template. Alternatively, you can also go File > Export > Motion Graphics Template.
Exporting Motion Graphics Templates from Premiere Pro CC is the same as After Effects CC. You can save it locally, to your Essential Graphics user library folder, or to your Creative Cloud Library.
Differences Between Motion Graphics Templates
Motion Graphics Templates created in Premiere Pro CC and After Effects are NOT the same even though they share the same name. The difference is Motion Graphics Templates created in Premiere Pro CC are really just graphic clips. Their default label color is "Lavender" for Stills. (You can adjust these under Preferences > Label Color and Label Defaults.) Motion Graphics Templates made in After Effects CC have the "Rose" label color for Dynamic Link. Remember, they are NOT actually Dynamically Linked - I'm only pointing out there's a visual difference.
NOTE: Dragging Motion Graphics Templates from After Effects CC into your Timeline creates an asset in the Project panel. Motion Graphics Templates from Premiere Pro CC only exist as an instance the Timeline, unless they are converted to a Master Graphic. Learn more about Master Graphics.
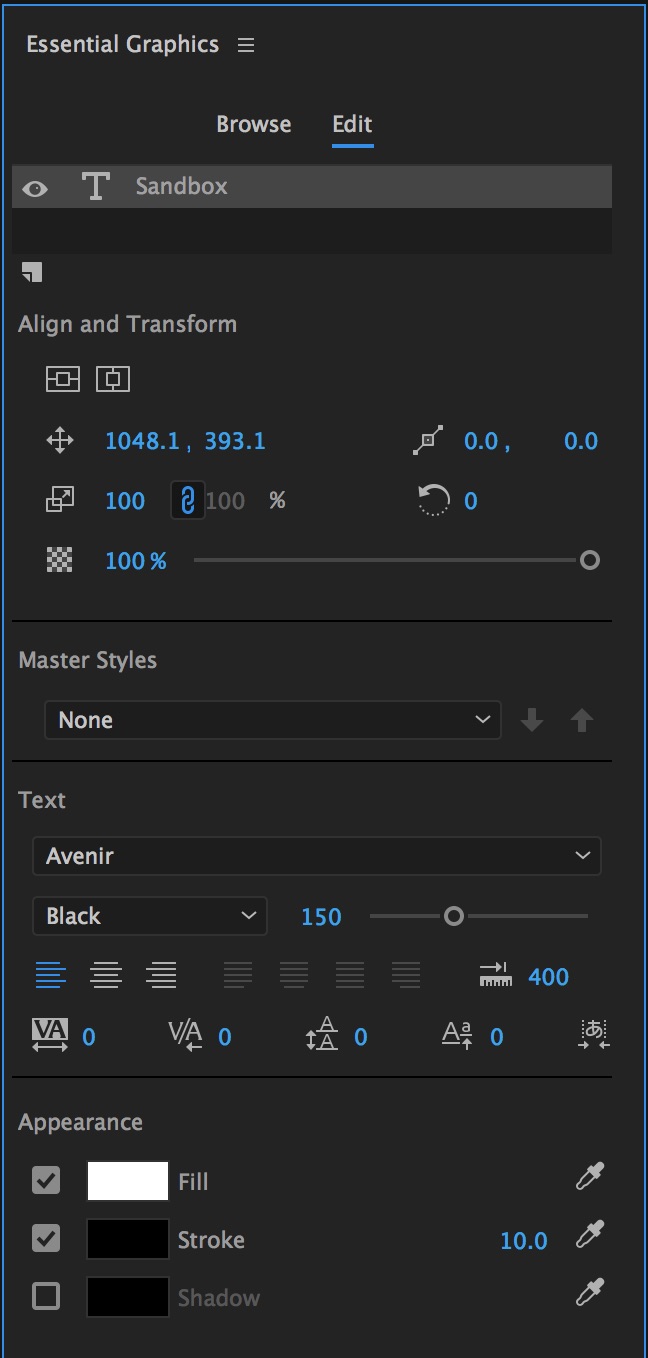
The difference between Premiere Pro CC and After Effects CC Motion Graphics Templates is especially obvious when you open them in the Essential Graphics panel. Again, Motion Graphics Templates made in Premiere Pro CC are really just graphic clips, so they can be edited with all the text tools in the Essential Graphics panel. Motion Graphics Templates from After Effects CC only have the editable properties that were included when the template was made.
Opening Motion Graphics Templates in Premiere Pro CC
Another reminder before jumping into Premiere Pro CC: After Effects CC is NOT required to use Motion Graphics Templates in Premiere Pro CC.
Browse Motion Graphics Templates
Open the new Essential Graphics panel in Premiere Pro CC. You'll notice two tabs: Browse and Edit. Click the Browse tab to navigate to your Motion Graphics Templates.
NOTE: There is no option to browse your system for Motion Graphics Templates.
There are two locations you can browse Motion Graphics Templates:
- Select Essential Graphics from the drop down to browse the default Essential Graphics user library folder. (Shown in the image above.) Again, this is the same user library folder where the Cache Files and Media Cache Files are stored. Double-click or use the second drop down to browse a specific folder in the Essential Graphics directory.
- Select Libraries to browse your Creative Cloud Libraries for Motion Graphics Templates. The one pictured below is a Library I created, not a default.
NOTE: You cannot import Motion Graphics Templates with the Media Browser, even though there is a Motion Graphics Templates filter. Maybe this will change in a later update.
Preset Motion Graphics Templates
Now is a good time to mention that Premiere Pro CC and After Effects CC (Spring 2017) each come with their own preset Motion Graphics Templates. They range from lower thirds, titles, social media, credits, and more. The preset Motion Graphics Templates in Premiere Pro CC are nothing fancy - but that's good! They're extremely practical, making them more useful to editors.
Install a Motion Graphics Template
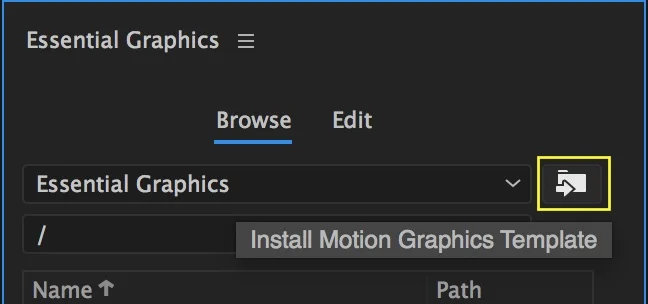
You're probably wondering why After Effects CC lets you export Motion Graphics Templates to your Local Drive but Premiere Pro CC doesn't let you open them. That's because you need to "install" Motion Graphics Templates in Premiere Pro CC.
Click the folder icon to the right of the top drop down to navigate to a Motion Graphics Template you want to install. This will copy the template to the Essential Graphics user library folder. You could also "install" a Motion Graphics Template by uploading it to your Creative Cloud Libraries.
Importing Motion Graphics Templates
When creating a new Premiere Pro CC project, you'll notice the new Motion Graphics Template Media scratch disk. When a Motion Graphics Template is brought into the Timeline from the Essential Graphics panel, Premiere Pro CC will copy the necessary template files to this scratch disk. Remember, Premiere Pro CC can only import Motion Graphics Templates that have been "installed" in the Essential Graphics user library or Creative Cloud Libraries.
As mentioned earlier, importing a Motion Graphics Template is as easy as dragging it into your Timeline from the Essential Graphics panel. When a Motion Graphics Template from After Effects CC is added to the Timeline, Premiere Pro CC will automatically add the template to your Project panel.
Organizing Motion Graphics Templates in Premiere Pro CC
QUICK TIP: You can change the view of the Essential Graphics panel by clicking the List View and Thumbnail View buttons in the bottom left of the panel.
Rename, Move, and Delete Motion Graphics Templates
Browsing and installing Motion Graphics Templates may feel a bit restrictive in Premiere Pro CC. Luckily, it's easier to organize them once they're inside the Essential Graphics panel. Right-clicking on any Motion Graphics Template will give you options to rename, move, or delete your template.
NOTE: All of these options (excluding Edit Columns) makes changes to the actual .mogrt file.
IMPORTANT: Deleting a Motion Graphics Template
Deleting a Motion Graphics Template from the Essential Graphics folder in the Essential Graphics panel removes it from your system. You will get a pop-up asking you to confirm deleting the file, but it doesn't warn you that it will permanently delete the .mogrt file.
Fortunately, the Essential Graphics panel does not let you rename, move, or delete Motion Graphics Templates from your Creative Cloud Libraries. This would cause big headaches for collaborators with shared Libraries. Login into your Creative Cloud Library to manage your Motion Graphics Templates.
Editing Motion Graphics Templates in Premiere Pro CC
The Edit tab is the creative side of the Essential Graphics panel. We won't spend much time on this because it's pretty self-explanatory. It's already been said in this post that editing Motion Graphics Templates made in After Effects CC is different than ones made in Premiere Pro CC. Templates from After Effects CC will have specific editable properties with custom ranges, and ones from Premiere Pro CC will have all the normal Essential Graphics text tools.
Sharing Motion Graphics Templates
Share the .mogrt File
It's easy to share exported Motion Graphics Templates with team members and collaborators. Simply send them the .mogrt file. The people you send the file to will need to install it in Premiere Pro CC as described above.
Share Motion Graphics Templates Via Creative Cloud
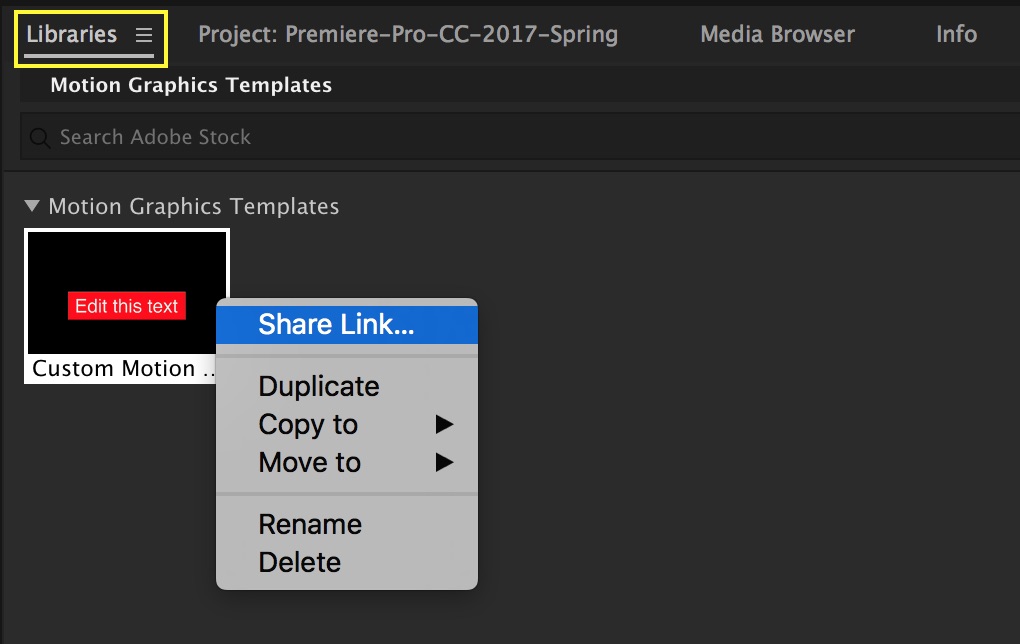
Secondarily, you can share Motion Graphics Templates with other team members via Creative Cloud Libraries. In the Libraries panel in Premiere Pro CC, right-click your template and choose "Share Link..." This opens the CC Libraries file in your internet browser where you can add collaborators.
QUICK TIP: The Libraries panel is also a convenient way of duplicating Motion Graphics Templates in Premiere Pro CC.
If you're going to be sharing multiple Motion Graphics Templates, you can create a shared Library for your team. Motion Graphics Templates saved to a shared Library will automatically sync with collaborators.
Helpful Links
Watch this in-depth Essential Graphics video by reTooled.net.
In this video, we explore The Essential Graphics Panel in depth. We go over: Exporting and Importing Premiere Pro created Motion Graphics templates Creating After Effects motion graphics templates as .MOGRT files.
Hope you enjoyed this deep dive into the Motion Graphics Templates workflow between After Effects CC and Premiere Pro CC. Have a question or a helpful tip? Please share in the comments below!


