Did You Know Premiere Pro Could Do These 5 Things?
Learn a 'new' way to apply transitions. Plus, how to remove multiple effects, un-nest sequences and more!
Premiere Pro is a deep program full of surprises. Sometimes we stumble upon new things by accident. Most of the time it's from tutorials. In this case, it's Venture Addicts who taught us something new in Premiere Pro. Follow our guide to their video and see how many of their five tips are new to you.
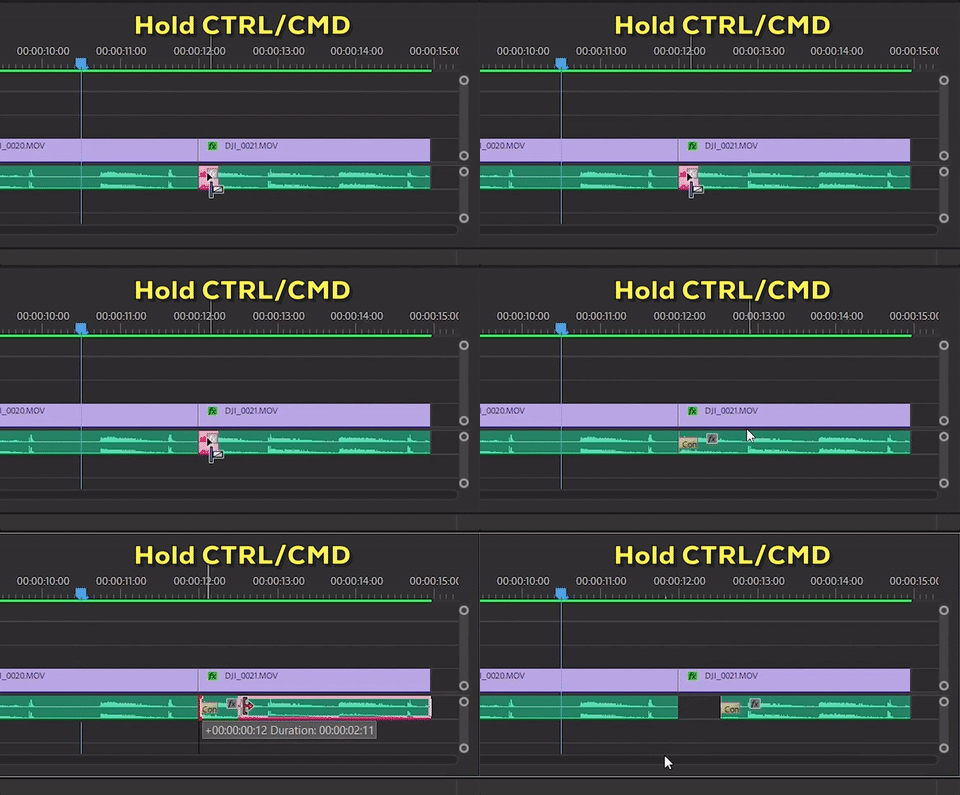
1. Hold CMD/CTRL to add transition to one side of edit point
In Premiere Pro, when you move clips or trim clip handles, transitions are automatically removed from the edit points. That's because the transition is applied to both clips.
Notice how trimming removes the transition. Via Venture Addicts
In some cases, you may want to add a video or audio transition to one side of the edit point so that the transition remains when trimming. In order to do this, you might think to move the clip, apply the transition, and then move it back to the edit point. Sound familiar?
Workaround for adding a transition to one side of an edit point. Via Venture Addicts
Have you ever wanted to be able to add a transition to either side of an edit point so you can still trim the clip handles but keep the transition? Well, thanks to Venture Addicts, you can! See how in the video segment below.
Just hold down the CMD/CTRL keyboard modifier when dragging the transition onto the edit point. You'll notice the hover transition icon change from yellow to blue indicating the transition will only be applied to one side of the edit point and not the other. Afterwards you can move or trim the clip with losing the transition.
Delete multiple effects from multiple clips with Remove Attributes
Pretend there's a bunch of clips with effects that you want to remove. You select a clip and, one-by-one, delete each effect in the Effect Controls panel, all the while looking at all the remaining clips still to go in your Timeline. Actually, no need to pretend. That's really happened. Many times.
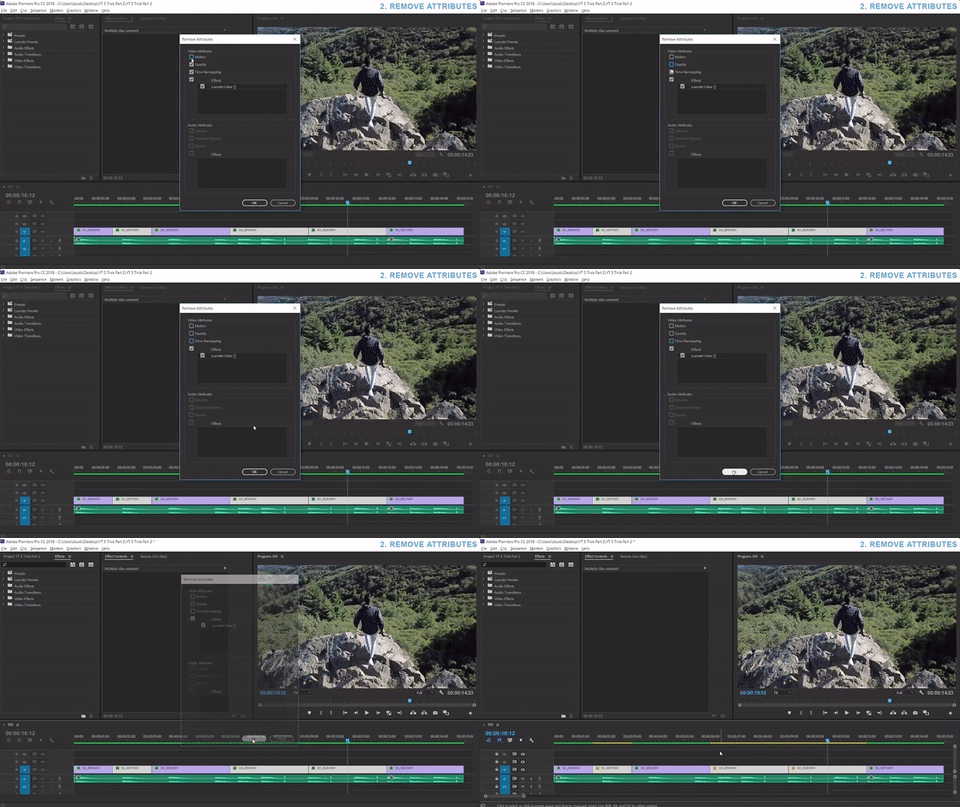
There's a better way to remove multiple effects from multiple clips in Premiere Pro. It's called Remove Attributes. Let Venture Addicts show you in the segment below.
- Select the clips with effects you want to remove (this includes intrinsic clip effects)
3. Reset Premiere Pro's Preferences and Plugin Cache
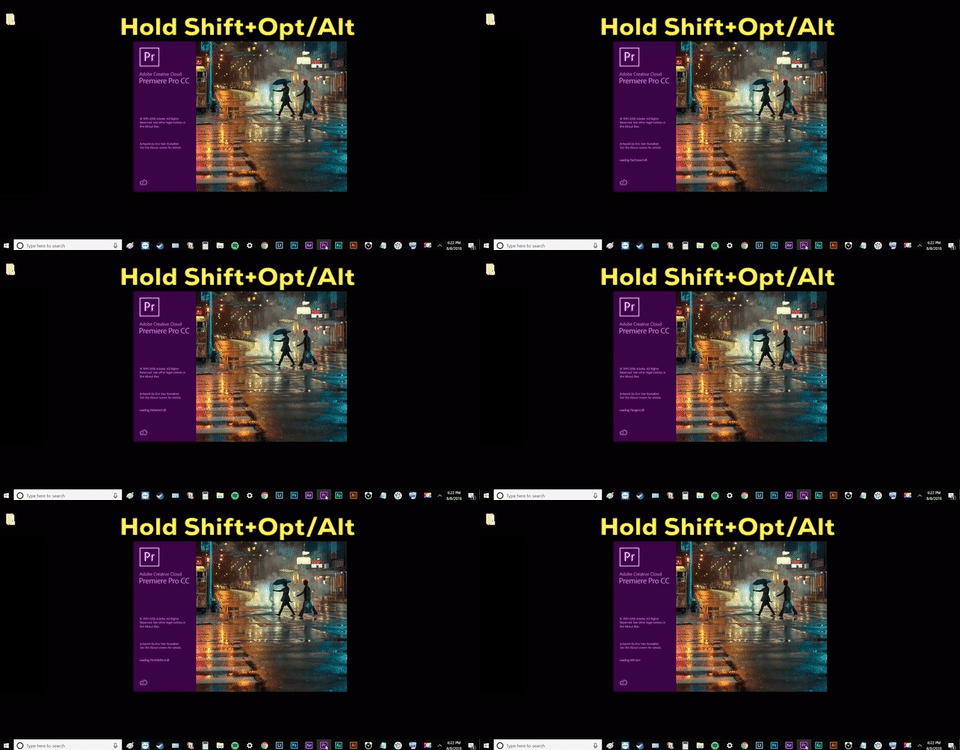
Once in a while it's good to get back to the basics and start with a clean slate in Premiere Pro. You may feel like you've "lost control" of Premiere Pro. You might have changed a customized your preferences and you'd prefer to go back to the default settings. Whatever the reason, it's easy to reset Premiere Pro's preferences to their out-of-the-box state.
Actually, just holding Opt/Alt resets Premiere Pro's preferences. Adding Shift resets the plugin cache. This is a good solution for troubleshooting plugins that aren't working. Just be aware, resetting the plugin cache can cause Premiere Pro to take a long time to restart, especially if you have a lot of third-party plugins. Learn more about resetting Premiere Pro preferences and plugin cache.
4. Nest and Un-nest Sequences
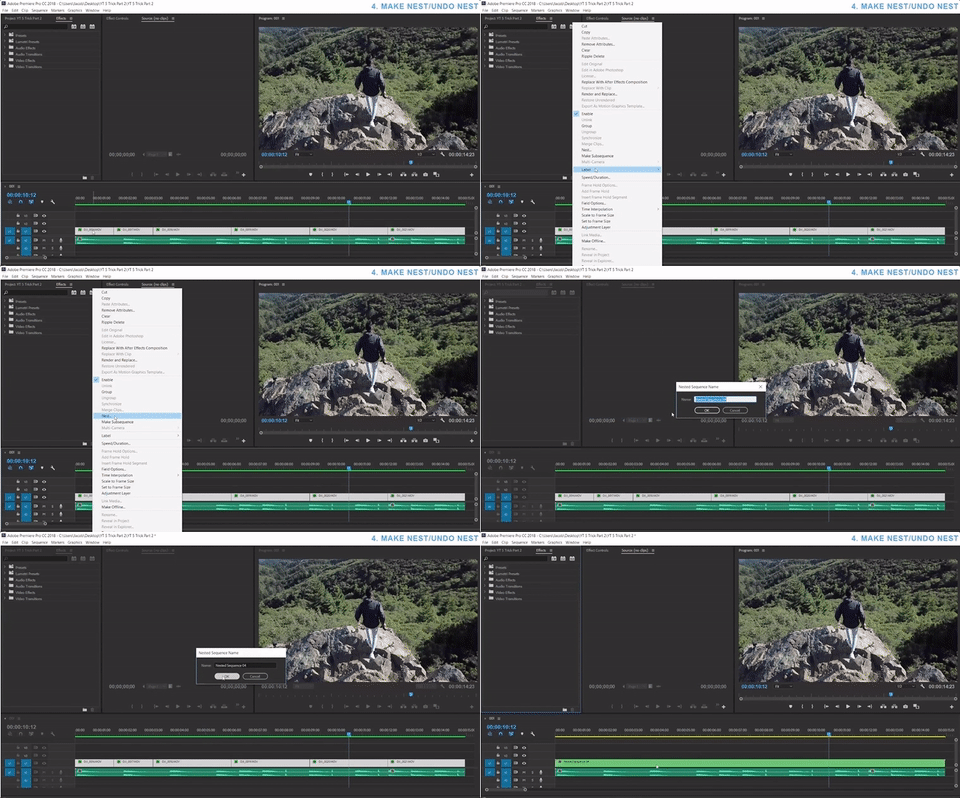
Nested Sequences are a good way to group clips together in Premiere Pro. They are often used for applying effects. For example, when using Warp Stabilizer with speed effects, you have to use a nested sequence to separate the effects. Nested sequences are also used for organizing scenes in a master sequence. But what if you want to un-nest a sequence? Venture Addicts answers that question with tip number 4.
This is the method Venture Addicts suggests for un-nesting nested sequences:
- Open the nested sequence (double click)
- Copy the clips
- Paste them back in the original sequence
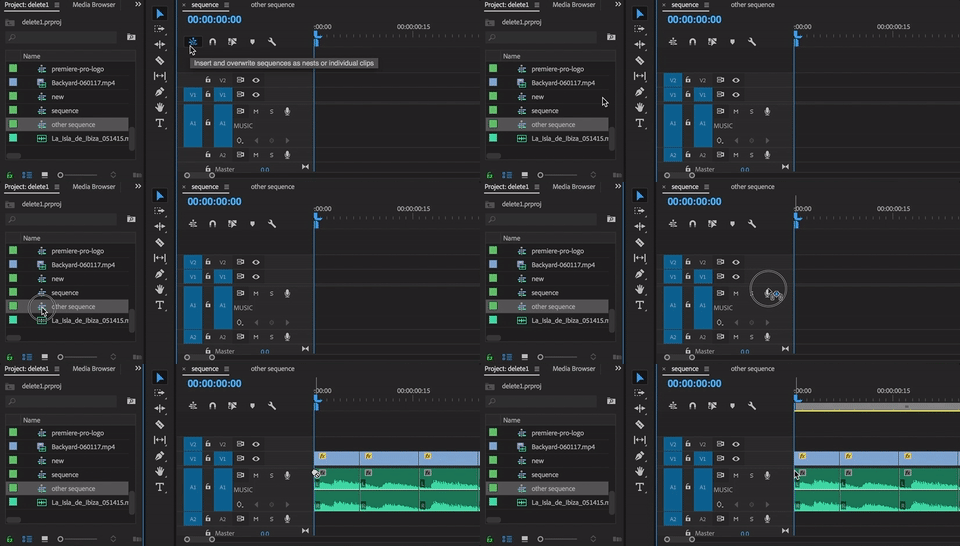
Alternatively, you can drag nested sequences (or any sequence for the matter) from the Project panel to the Timeline as un-nested clips. To do this, toggle the "Insert and overwrite sequences as nests or individual clips" button in the Timeline to white.
Toggle this button to white to bring in sequences as un-nested clips.
Now sequences will come into the Timeline un-nested. This feature is also commonly known as the "nest or not nest" button.
The "nest or not nest" button in action.
You can also load a sequence into the Source monitor and edit it into the Timeline as un-nested clips. Right click the sequence in the Project panel and choose Open in Source Monitor. From there it's Insert and Overwrite as usual.
5. Loop Playback
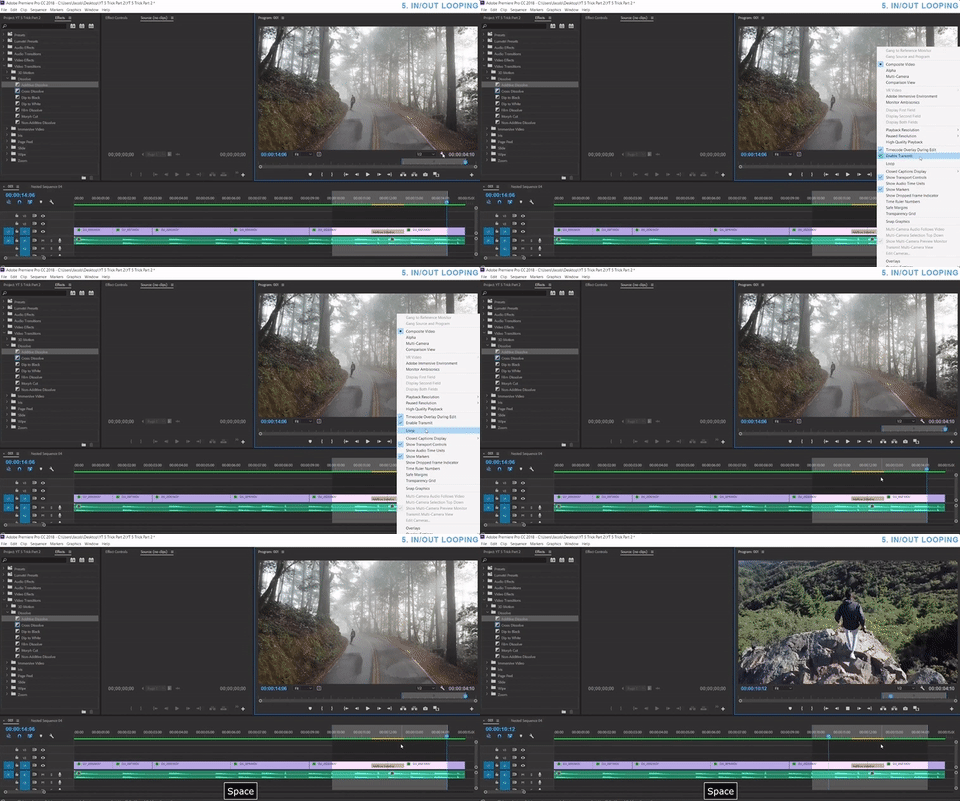
For the last tip, Venture Addict shows how to loop playback in Premiere Pro. As Jacob suggests, looping playback is helpful for reviewing a part of your edit, like an edit point or an effect. Learn how to loop a specific section of your Timeline in this video segment.
- Set an In and Out point around the area you want to loop
- Click the wrench icon in the Program monitor and check Loop
- Start playback and it will loop between your In and Out points
You can also use the default keyboard shortcut CMD/CTRL+L to turn on looping. But you have to make sure the Program monitor is active, not the Timeline.
Bropinion
We love when we're surprised by a Premiere Pro tutorial, especially when it's a list of tips and tricks. Often times they're the same old thing. But not this tutorial! Venture Addicts taught us something new with their first tip of holding down CMD/CTRL when applying transitions. Very nice discovery on the part of Jacob, the video host.
It just goes to show that meddling around in Premiere Pro, as Jacob said he was when he found this tip, can easily lead to new editing workflows and shortcuts. So take some time once in while to randomly hit some keys and click some buttons in Premiere Pro!
Were you familiar with these tips? How about tip number one in particular? Have you every been in a situation where you would have found that shortcut useful? Let us know below!
Venture Addicts
Venture Addicts is Mac, Jacob and Tim. Together, they discovered they're passion for travel and video content creation. 2 years later, they quit they're day jobs to work with clients and travel the world. Support them and stay up-to-date by subscribing to their YouTube channel and following them on Instagram.


