Peter McKinnon Thinks You Should Know These 10 Premiere Pro Tips
Watch Peter McKinnon's "Amalgamation" of Premiere Pro Tips.
Always be learning. It's what separates the pros from the amateurs: pros never stop learning. And YouTuber legend Peter McKinnon exudes a love for learning in all his videos. In this tutorial, Peter shares his "highly anticipated" top 10 Premiere Pro tips he's collected over the years. These tips are appropriate for all skill levels, so there's something for everybody. We've broken out each tip into its own segment so you can get the most out of Peter’s tips and his McKinnonisms.
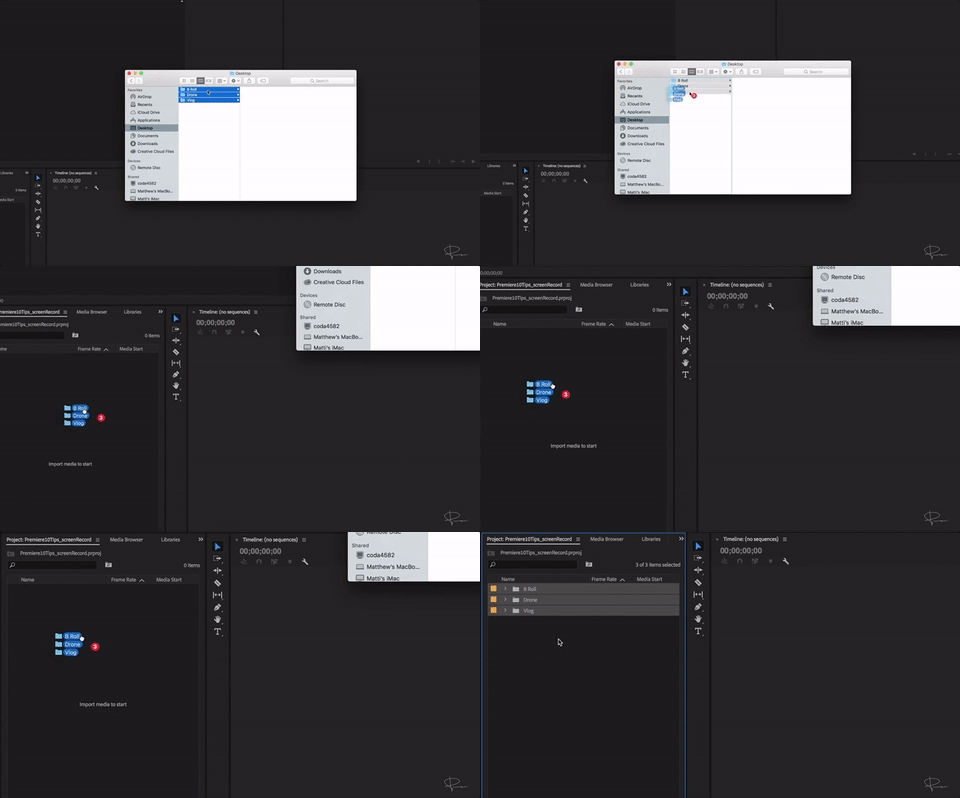
1. Drag and drop folders in the project panel
Peter is a big fan of organization, as any editor should be. Premiere Pro's bins make it easy to keep your media organized in the Project panel. But did you know you can drag folders directly into Premiere Pro?It saves the step of having to create a new bin before importing your media. Peter also covers other general organizational tips such as color coding footage with Labels in Premiere Pro.
2. Master Clip effects
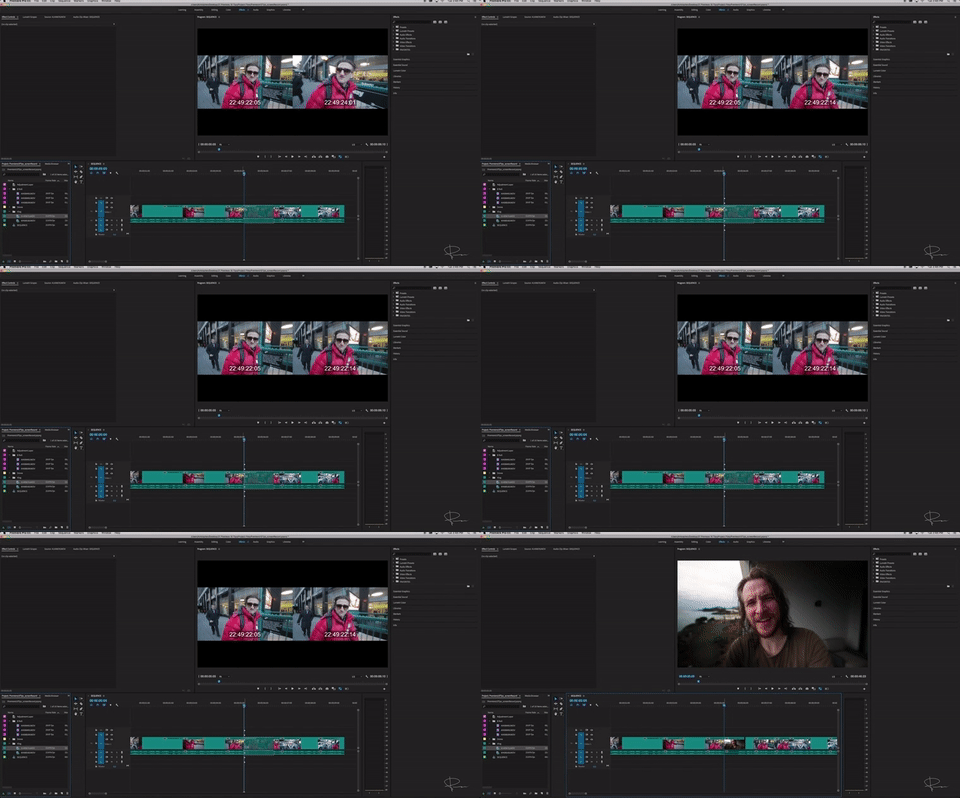
Master Clip effects in Premiere Pro allow you to apply an effect to all clip instances in the Timeline. This is extremely useful when you want to use the same color grade to a single clip that has many cuts, like a vlog for example. Apply a Master Clip effect directly to a clip in the Project panel or under the Master tab in the Effect Controls panel. Learn more about Master Clip effects in Premiere Pro.
Fun Fact: you can see Peter KcKinnon is using Mojo, a Magic Bullet effect by Red Giant.
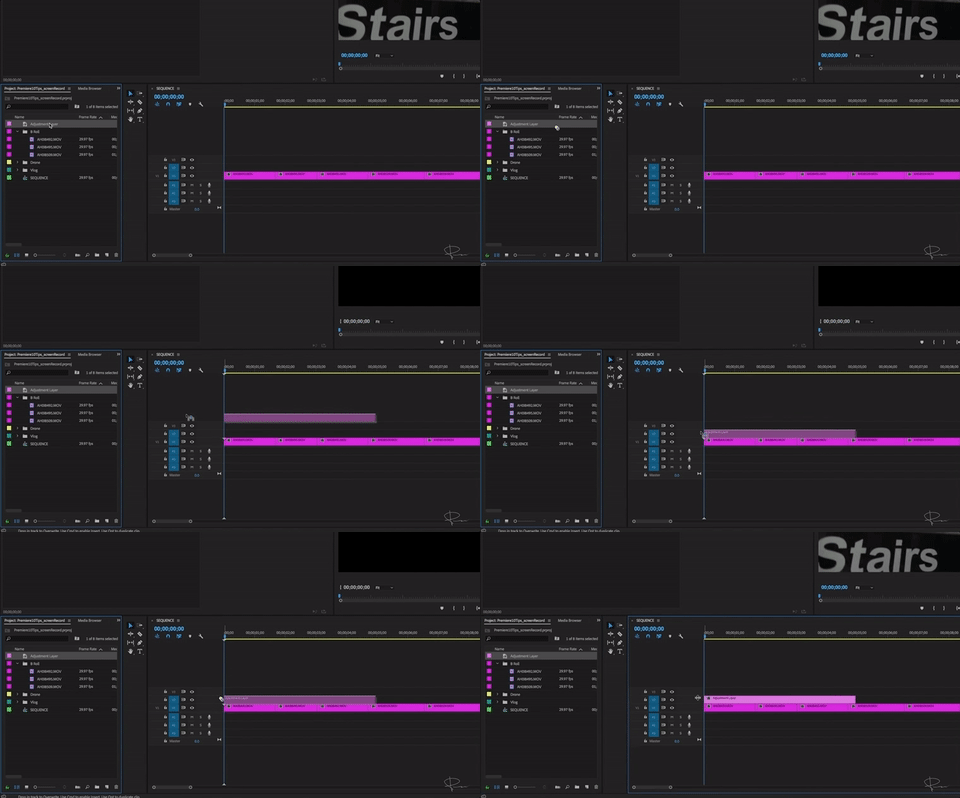
3. Adjustment layers
Similar to Master Clip effects, adjustment layers allow you to apply effects to multiple clips in the Timeline. Any clips underneath the adjustment layer will have the effects applied to them. Peter suggests using an adjustment layer to apply a top and bottom Crop effect to create a fake widescreen aspect ratio, commonly known as "cinematic black bars". Peter suggests cropping the top and bottom to 13%. Learn more about adjustment layers in Premiere Pro.
4. "Kill Switch" - save projects on frozen screen
This is a backdoor way to get rid of the "spinning beach ball of death" on a Mac in order to save your work in the event of a freeze. Open the Activity Monitor and look for Premiere Pro's PID number. Next, open Terminal and enter the following:
kill -SEGV -[PID#]
Replace "[PID#] with the PID number from the Activity Monitor. This will allow you to save your project before restarting the Premiere Pro. Use at your own risk.
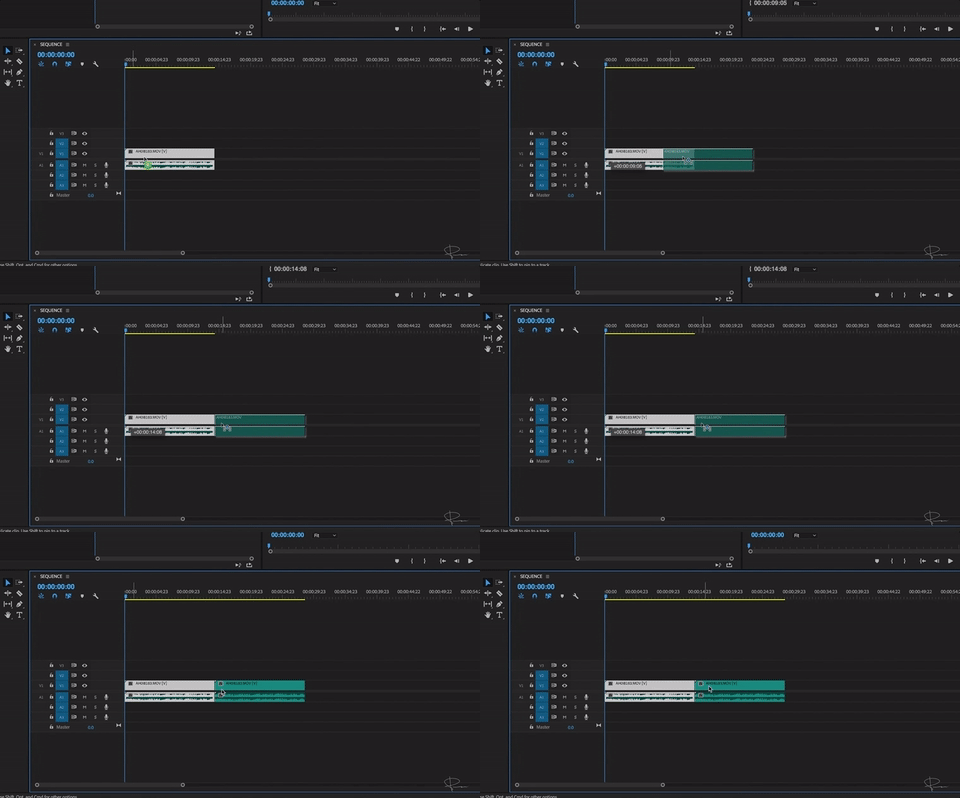
5. Quickly copy/paste clips in the Timeline
Instead of using keyboard shortcuts to copy and paste clips, simply use the keyboard modifier Opt/Alt when dragging to duplicate a clip in the Timeline. It's little things like this that add up to big time savings.
6. Select all clips right or left in the Timeline
Use the keyboard shortcut 'A' to switch to the Track Select Forward Tool. Click anywhere in the Timeline and everything to the right will be selected. Hit SHIFT+A to select everything to the left with the Track Select Backward Tool.
PRO TIP: Use track locking to limit which tracks are selected.
7. "Drop Shift" - Insert edit
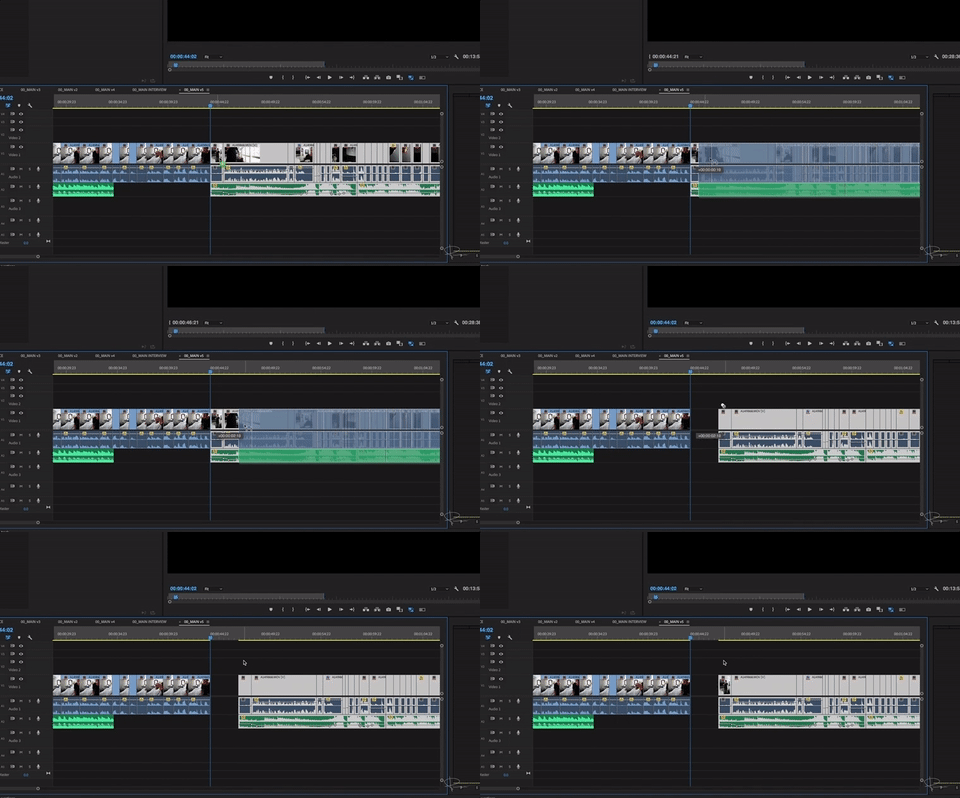
Instead of manually moving clips in the Timeline to make room for a new clip, use keyboard modifier CMD/CTRL while dragging a clip to do an insert edit. When you hold CMD/CTRL while dragging you'll notice the playhead grows teeth, indicating an insert edit and everything else will be pushed forward in the Timeline.
8. Locking layers (tracks)
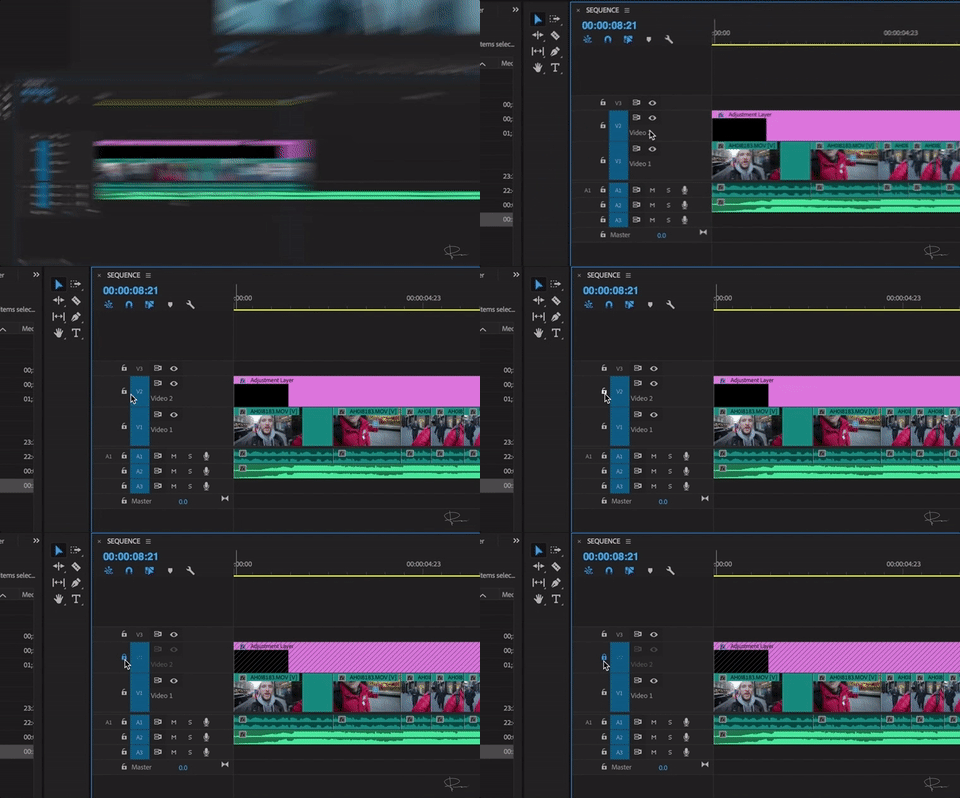
Peter recommends locking tracks with adjustment layers or music tracks so aren't accidentally moved or cut while you're editing in the Timeline. Just click the lock icon in the track headers you want to lock. It's easy and it keeps your Timeline nice n' clean.
9. Using proxies to speed up playback performance
What are proxy files? In short, they are low resolution, low file size versions of your original media. Premiere Pro can create proxy files and seamlessly switch between them and original media while you edit. Working with proxies can dramatically improve the performance of your playback, so toggle them on when you're editing or doing heavy effects work. Premiere Pro will always use the original media for exporting.
Learn more about Premiere Pro's proxy workflow.
Don't see the Toggle Proxies button? Click the plus icon in the bottom right of the Program monitor and drag the button to the control bar.
10. Editing while exporting
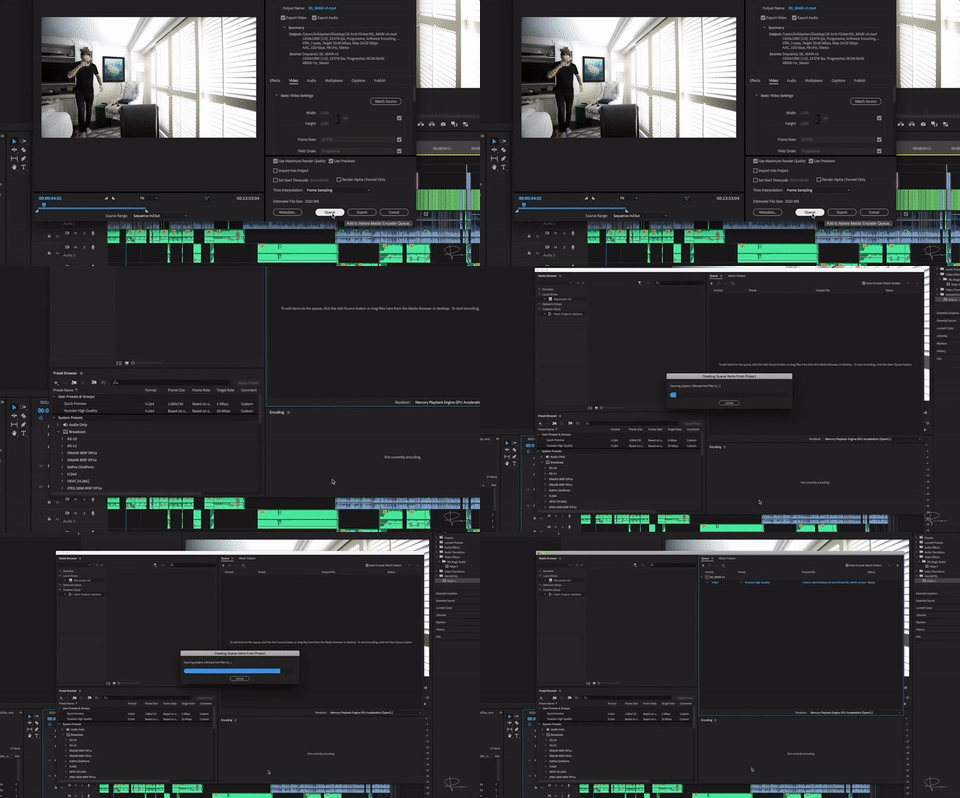
Thanks to Adobe Media Encoder, editors can continue editing in Premiere Pro while their exports (or proxies) are encoding in the background. Just hit the Queue button instead of Export in the Export Settings window to send the sequence to Adobe Media Encoder.
Bropinion
Peter McKinnon's tutorial is a fantastic collection of Premiere Pro tips appropriate for all skill levels. Even though the video is a little long for a tutorial, it's amazing how much knowledge Peter is able to cram in. For example, he covers Premiere Pro's proxy workflow in 2 minutes. And that includes all his Peter McKinnonisms!
Which tip was your favorite? Was there a tip you had no idea existed? What's Peter's best moment in this tutorial? Let us know below.
Peter McKinnon
Peter McKinnon is a photographer and filmmaker currently residing in Toronto. He has over 2.3 million subscribers to his YouTube channel. Support Peter by checking out some of his merch.


