Create Titles with the New Type Tool and Essential Graphics Panel in Premiere Pro CC 2017.1 (Spring)

In-Depth Premiere Pro CC 2017.1 Tutorial on the Type Tool and Essential Graphics Panel
The new Type tool and Essential Graphics panel in Premiere Pro C 2017.1 (Spring) replace the Title Designer and fundamentally change text and graphic workflows in Premiere Pro CC. Here's what the future of creating titles and graphics looks like in Premiere Pro CC...
It's so good.
Much like the Lumetri Color panel simplified color, the Essential Graphics panel centralizes text and graphic tools into one user-friendly panel. In it you can edit text made with the new Type tool as well as customiz Motion Graphics Templates made in After Effects CC. There's a lot more you can do in the Essential Graphics panel, and hopefully this deep-dive answers your most burning questions.
How Do I Make a New Title?
So you want to make a new title in the latest version of Premiere Pro CC. You right-click in the Project panel or click the New Item button and... there's no New Title option. Anywhere.
That's because the Type tool is now part of the main interface located next to the rest of the editing tools. NOTE: You still can choose File > New > Legacy Title to open the Title Designer.

Select the Type tool, click in the Program monitor, and type your text right on your footage. Likewise, use the Pen tool to draw a shape in the Program monitor.

Graphic Clips
When you use the Type or Pen tools in the Program monitor, it automatically creates a new graphic clip in the Timeline. Once you're finished typing your text, the graphic clip assumes the name of the title you've created.
The default length of the graphic clip is based on Still Image Default Duration, which can be changed under Preferences > Timeline.
Master Graphic Clips
Graphic clips only live as instances in the Timeline; they are not automatically added to your Project panel. Clicking and dragging a graphic clip from the Timeline to your Project panel converts them to a Master Graphic clip with all the text and shape adjustments added as master clip effects.
Alternatively, you can select a graphic clip in the Timeline and under the new Graphic menu select Upgrade to Master Graphic.
Add Multiple Text and Shape Layers in One Graphic Clip
You can add multiple text and shape layers to a single graphic clip either by clicking the New Item button in the Essential Graphics panel or by using the Type or Pen tools in the Program monitor. Make sure to select the existing graphic clip before using the Type or Pen tools. Otherwise it will create a new graphic clip.

Don't overlook the fact that you can create a layer "From File" under the New Layer button. When you import a layer (png, jpg, etc.) it will be added to your Project as well.
Edit Your Title in Essential Graphics Panel
Making adjustments to your text and shape layers in the Essential Graphics panel is pretty self-explanatory. You will recognize all the typical text tools common to most Adobe applications.
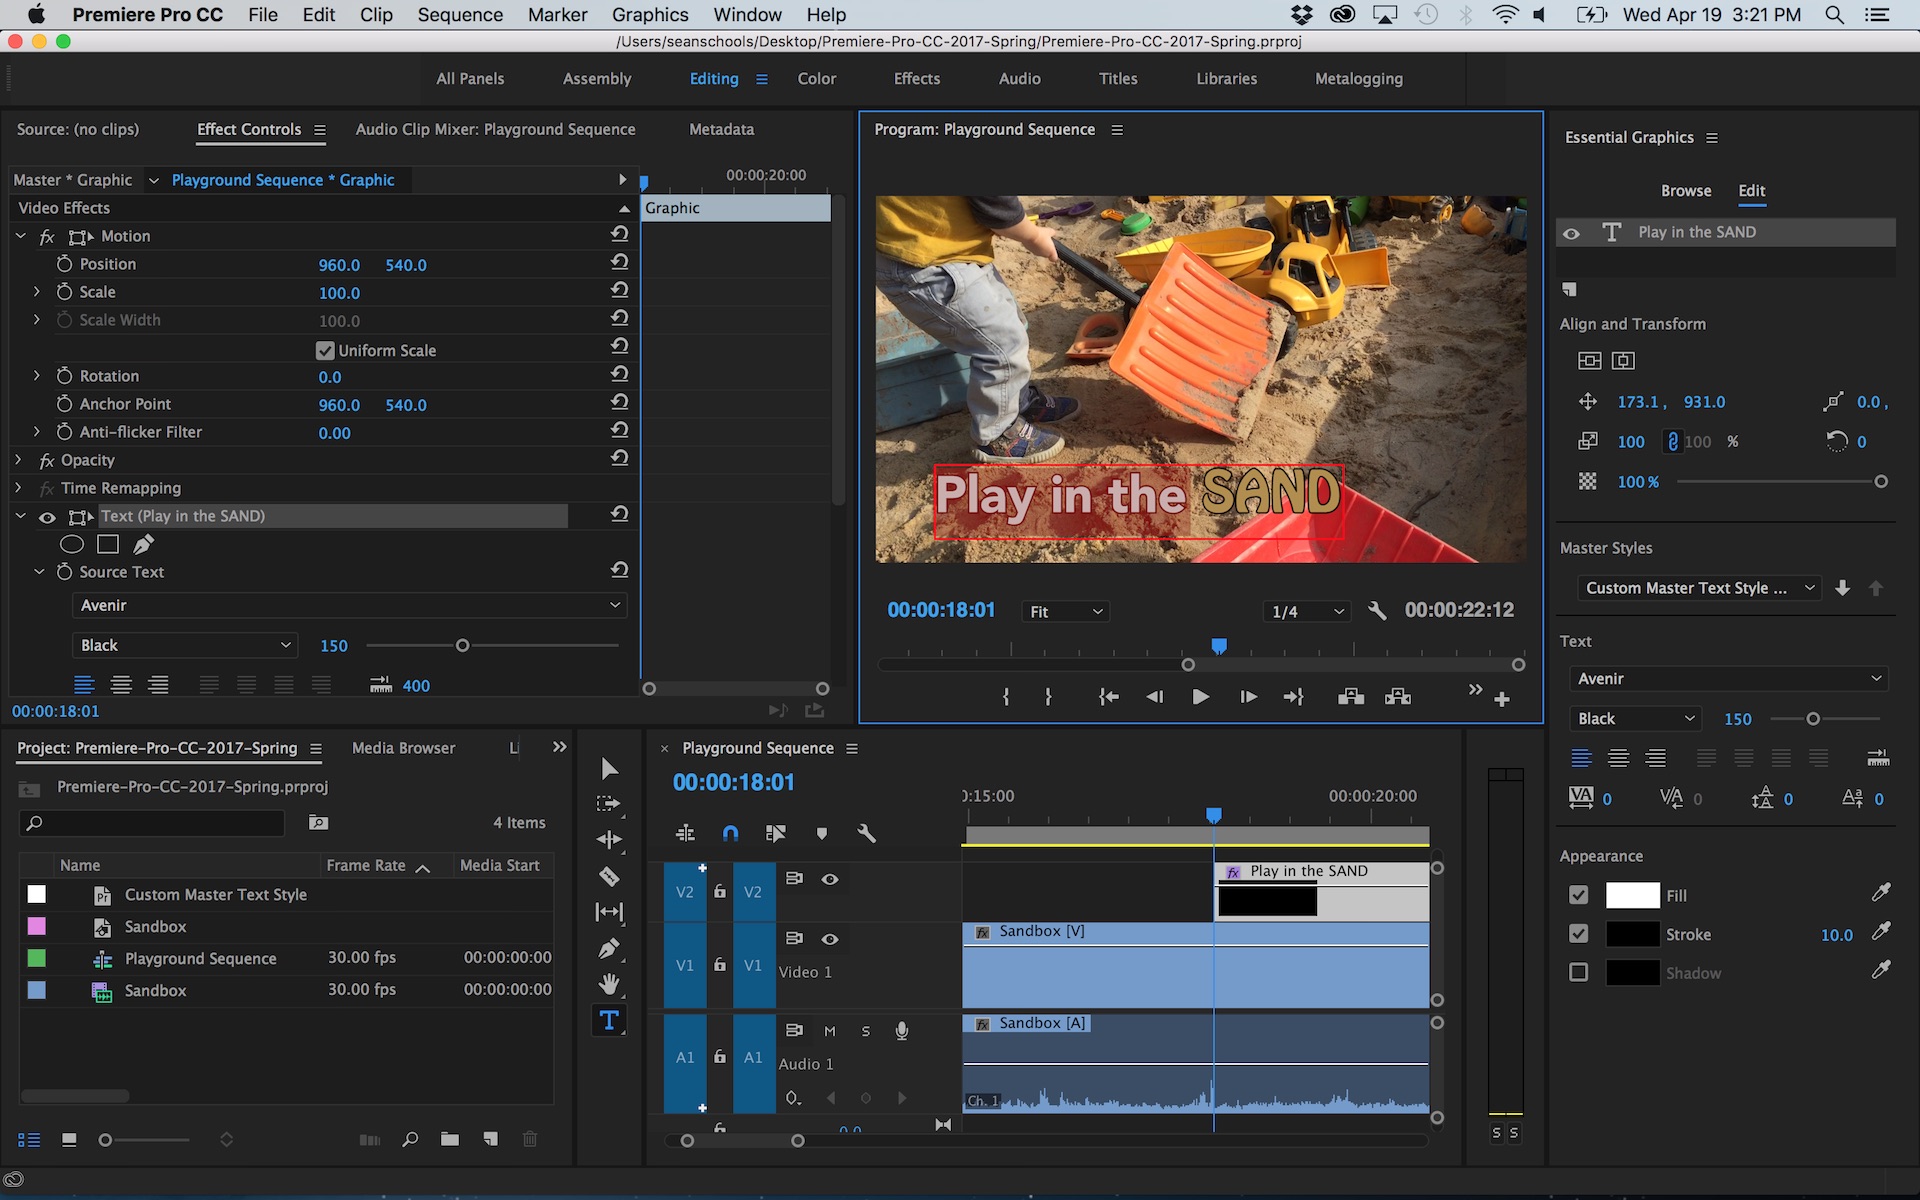
It IS possible to have multiple fonts and sizes in the same text layer in the Essential Graphics panel. As you can see in the image above, there are two fonts in the same text layer. Just select the specific text in the Program monitor and modify the text as you normally would.
Master Text Styles
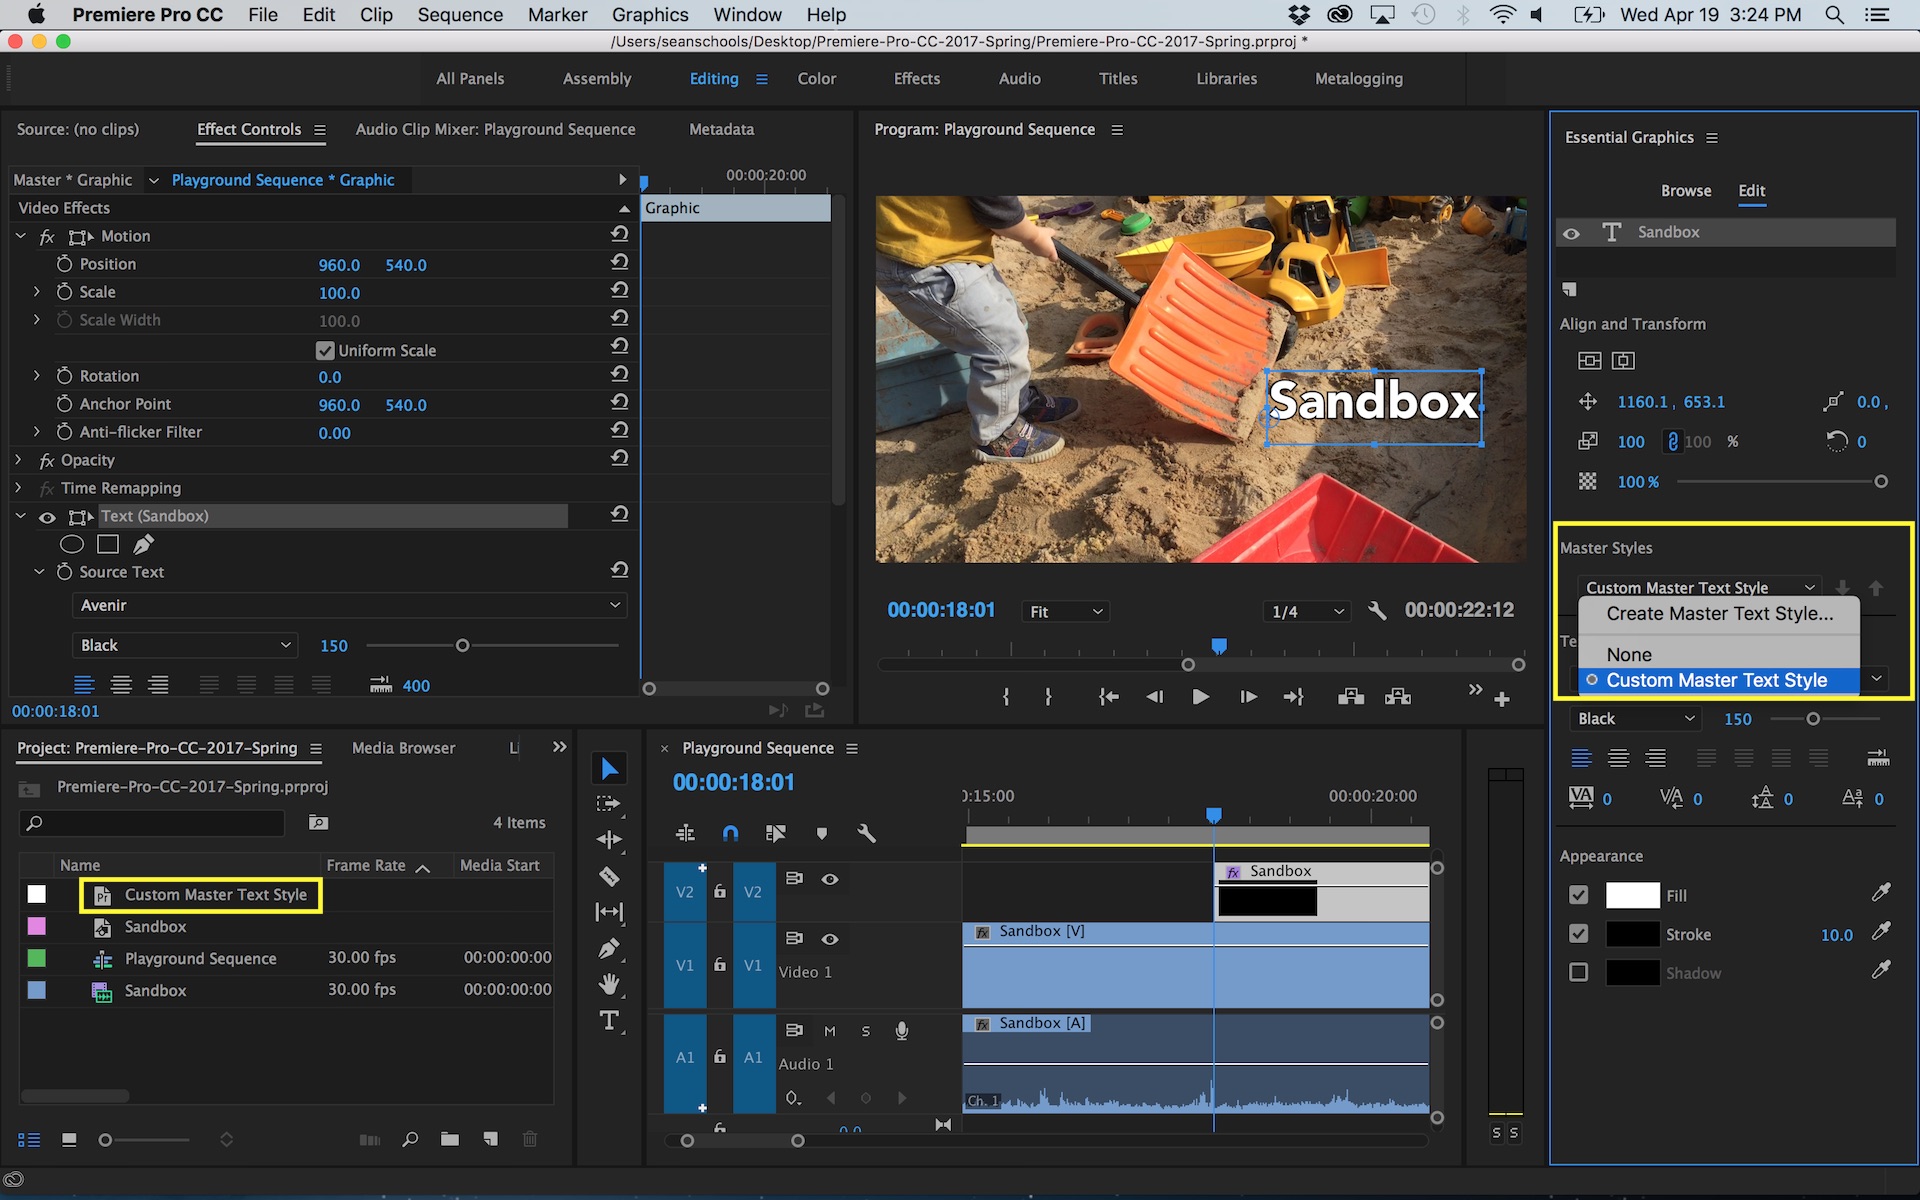
One cool unexpected feature in the Essential Graphics panel is Master Text Styles. These style presets could be compared to the old Title Styles in the Legacy Title Designer. What's different is Master Text Styles are saved as utility-type files in your Project panel. This makes them specific to the projects they were created in. Deleting the Master Text Style from the Project panel removes it from the Master Styles drop down in the Essential Graphics panel.
NOTE: I wasn't able to import Master Text Styles from another Premiere Pro project via the Media Browser. However, I was able to import it the Import Project window. Just import a Premiere Pro project like would any other file.
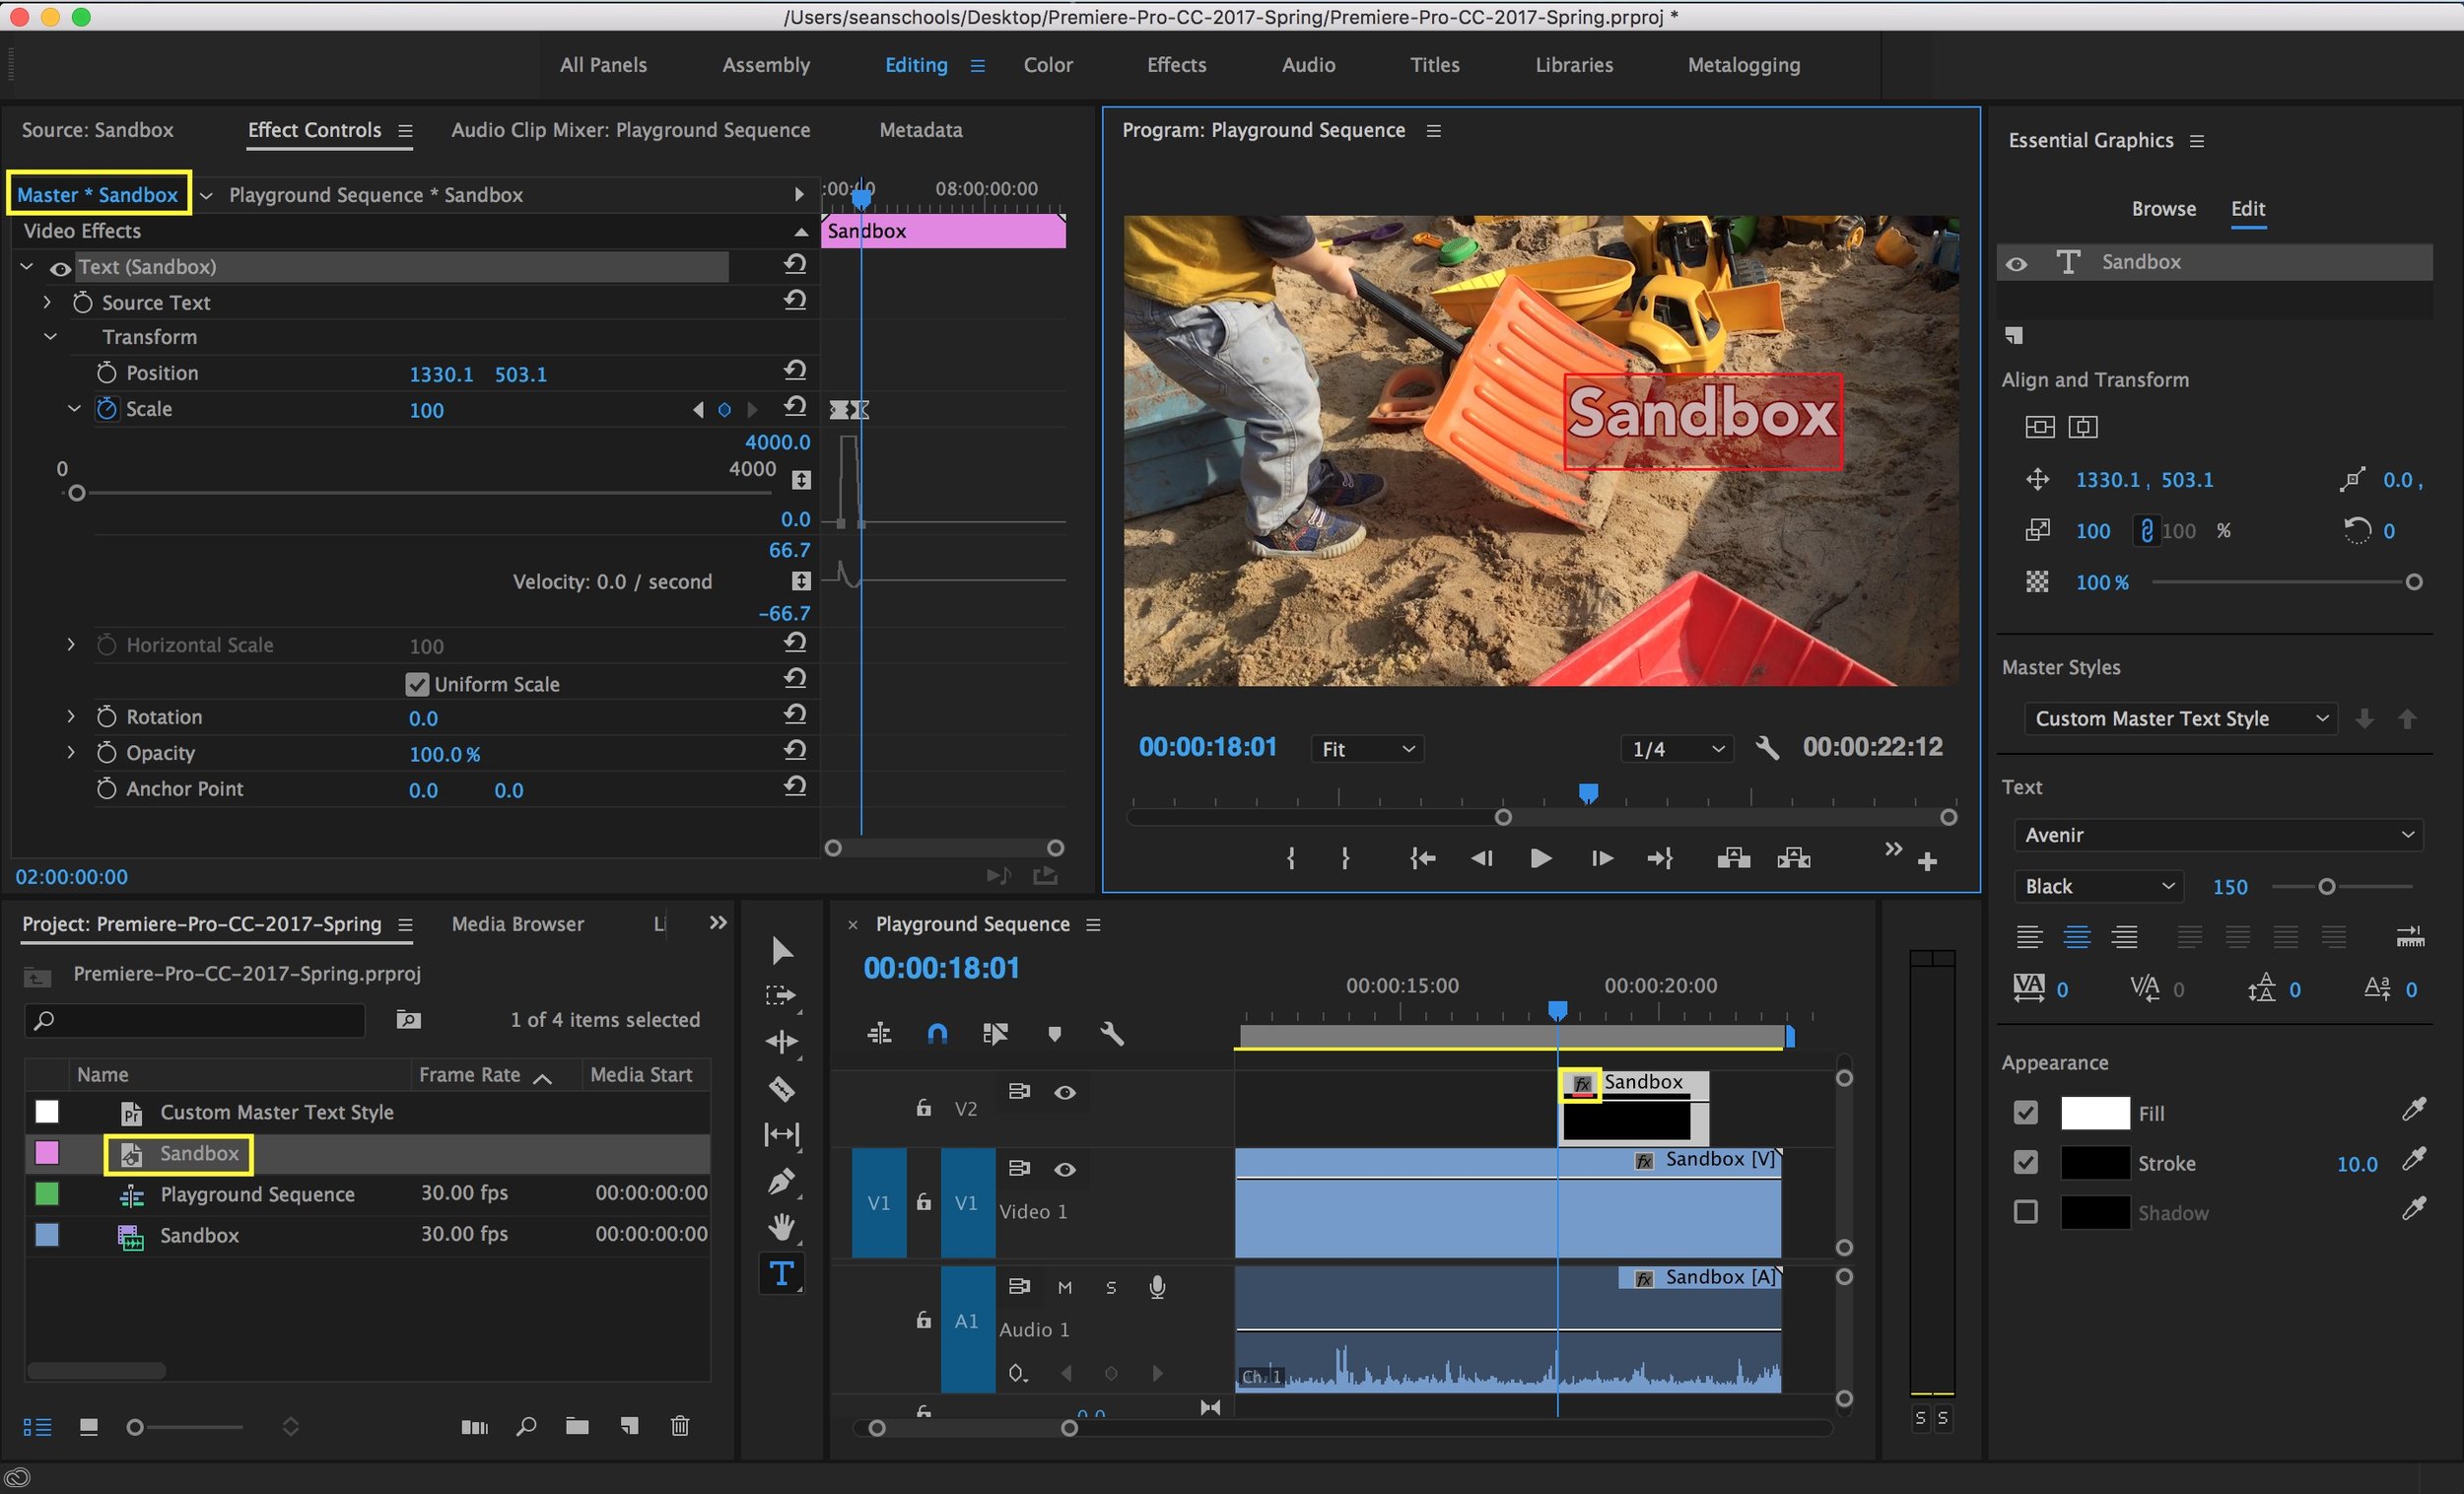
To apply a Master Text Style, select a clip and choose a style in the Master Text Style drop down in the Essential Graphics panel. You can apply a Master Text Style to multiple graphic clips by selecting them in the Timeline and dropping the Master Text Style file on them as shown below.

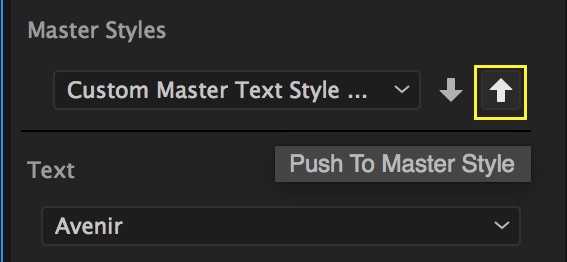
If you've made changes to the style of your text and want to update a Master Text Style, you can click the up arrow to the right of the Master Text Style drop down to Push to Master Text Style. This will save your style adjustments over the Master Text Style.
Animate Graphics in the Effect Controls Panel
Let's say you want to animate your title. You head over to the Essential Graphics panel and... there's no keyframe animation stopwatches anywhere.
That's because all animation is done in the Effect Controls panel. Again, it's just like the Lumetri Color panel. Each layer in a graphic clip has its own motion parameters so they can be animated independently.

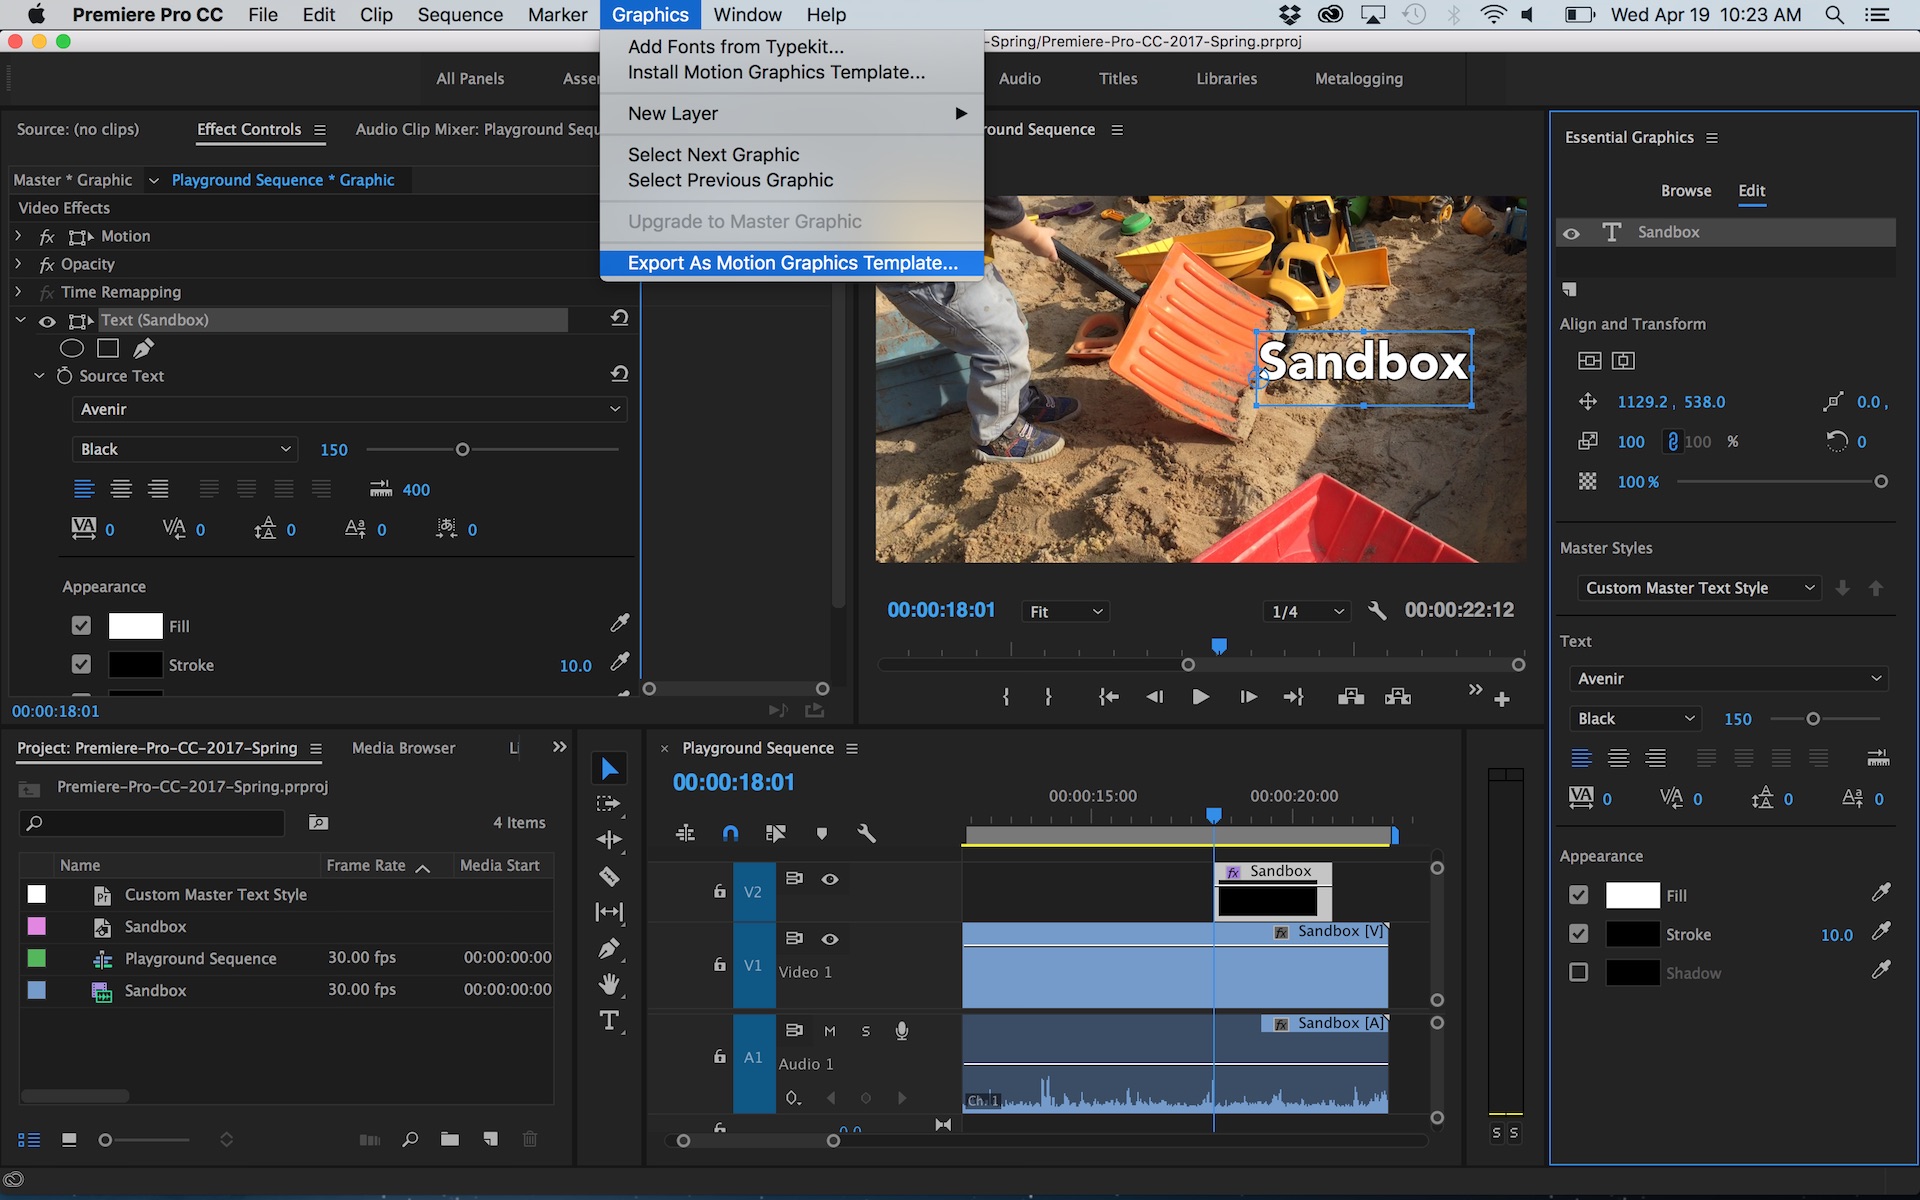
Export as Motion Graphics Template
Let's say that you need to use the same graphics for multiple video projects. You can export animated titles and graphics in Premiere Pro CC as Motion Graphics Templates. This save the design and animation of your graphics as new .mogrt file format that can be imported into other Premiere Pro projects via the Essential Graphics panel.
You can save a Motion Graphics Template to three destinations:
- Local Disk - select this option to unlock the ability to browse to a specific destination
- Motion Graphics Templates - this saves the .mogrt file to the Essential Graphics user library folder (same place as the default Media Cache and Media Cache Files)
- Creative Cloud Libraries - save your .mogrt file to a Creative Cloud Library to share with collaborators.

Helpful Links


What do you think about the new text and graphic workflows in Premiere Pro CC 2017.1? Do you have any questions about the new Type tool or Essential Graphics panel? Any helpful tips you'd like to share? Please post them in the comments below!